Please note that Maxelpay is not involved in any investment opportunities or offers. If you receive suspicious emails, avoid responding or sharing personal information and verify directly with customer support.
For New Merchant: To establish a new merchant account with MaxelPay, follow these steps:
Create an account by visiting the registration page. You also have the option to sign up using your Google account for a faster registration process. Choose any option that is most convenient for you.
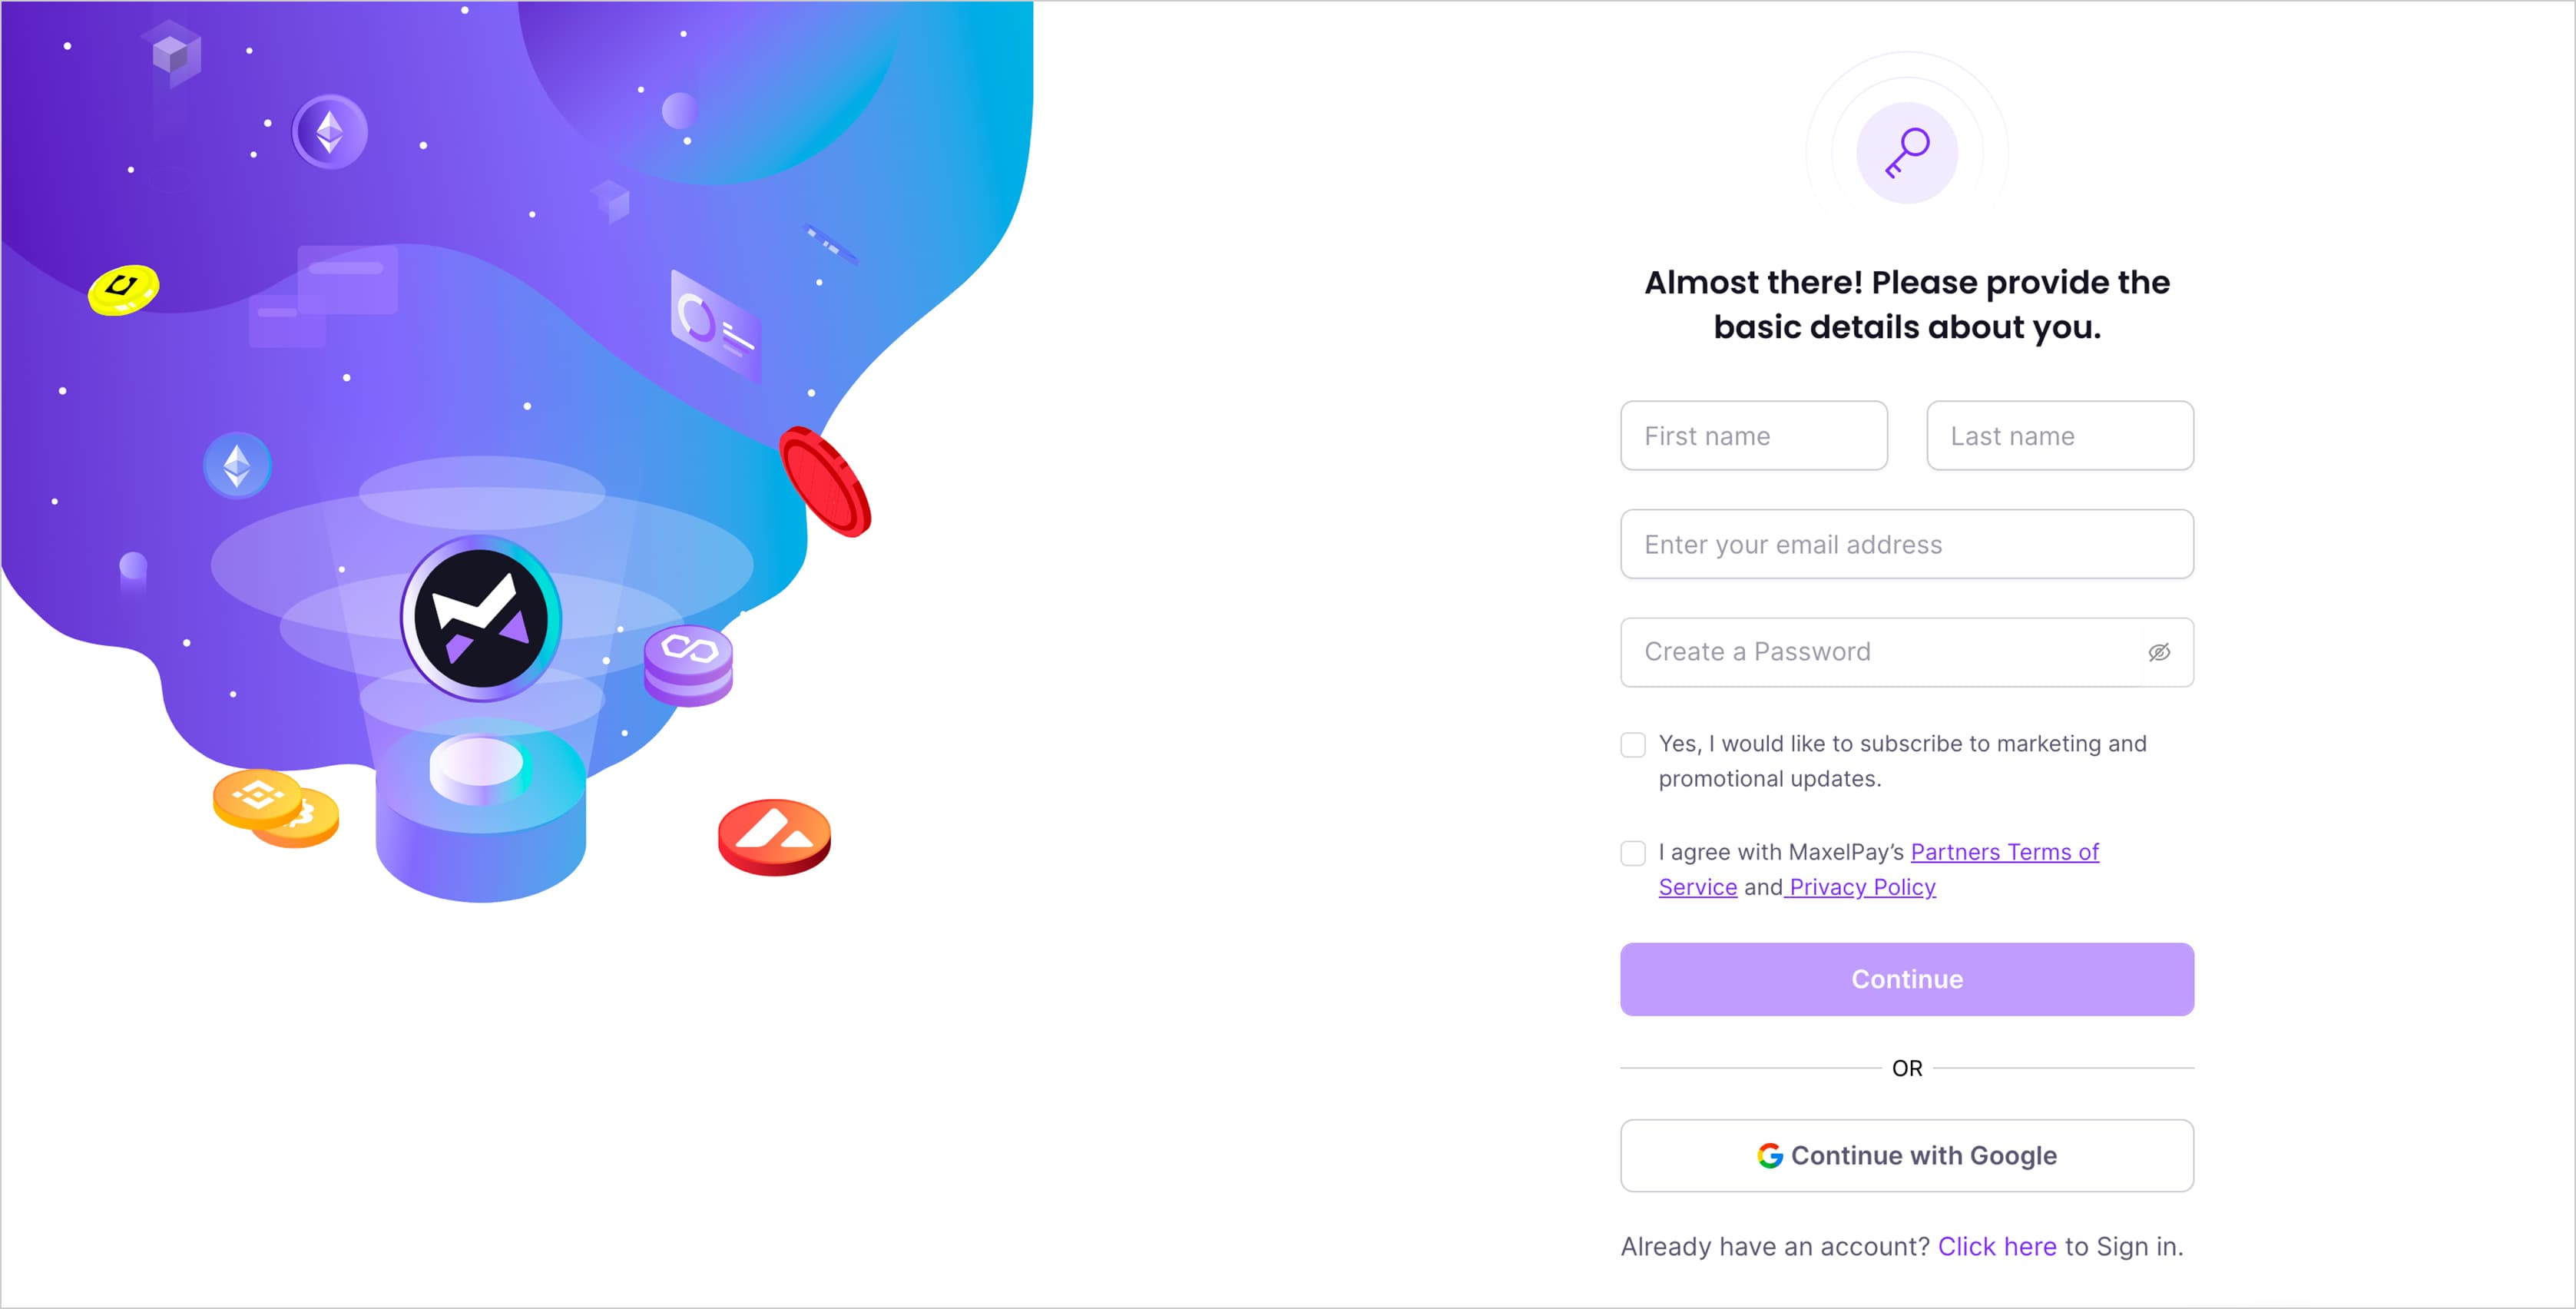
Enter your First and Last Name and Email Address to create a new account.
Click the "Continue" button to proceed with your registration.
After clicking "Continue," check your email for the One-Time Password (OTP). Enter the “Code” as shown in the image below.
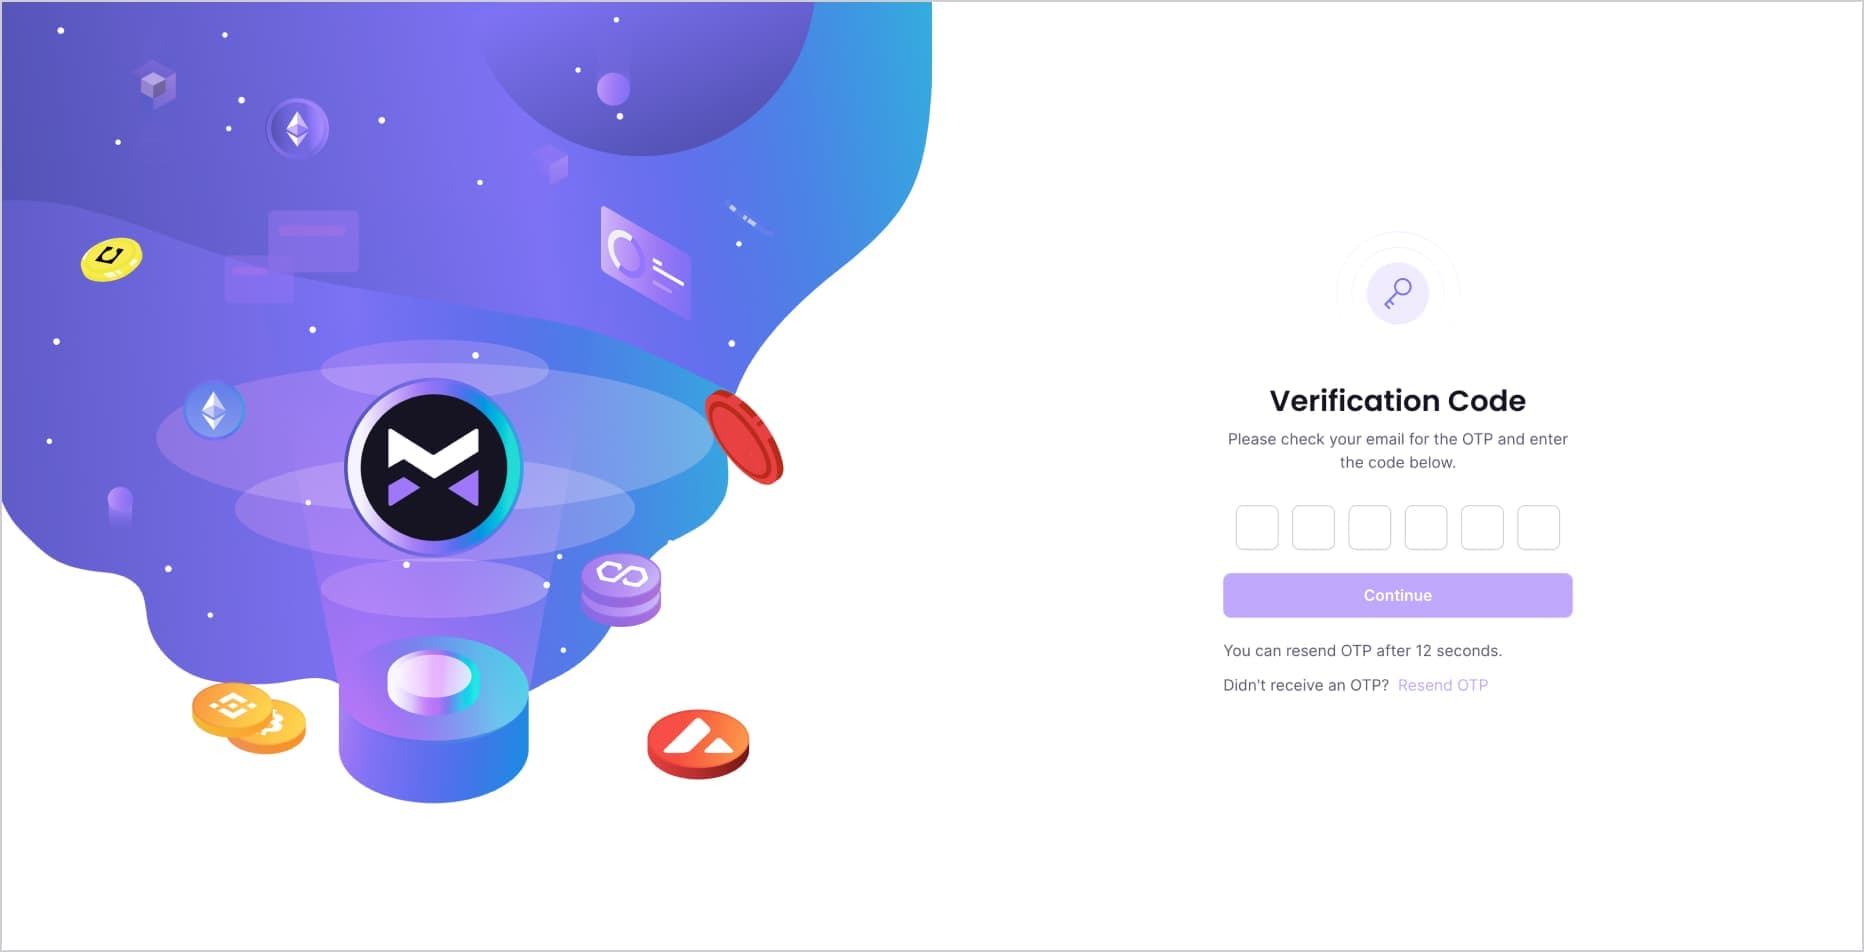
If you did not receive the OTP, click on "Resend OTP" to get a new one.
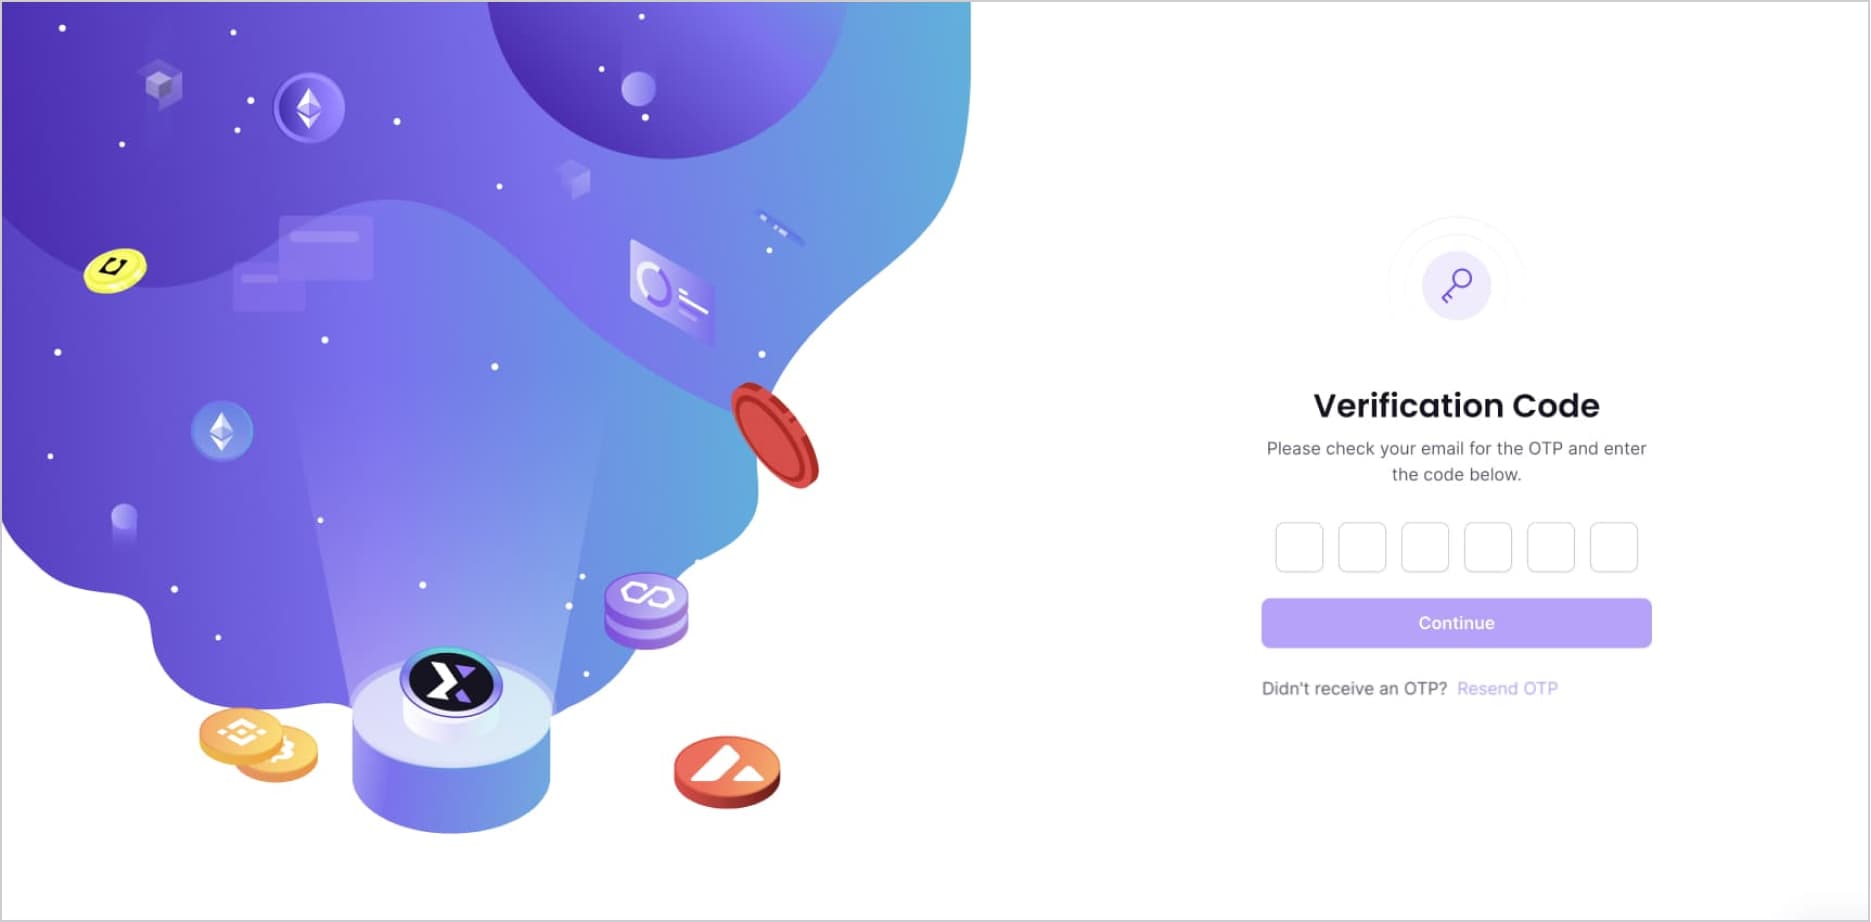
After entering the OTP, click the "Continue" button. Your account will be created, and you will be taken to the “MaxelPay dashboard”. This is where you can create invoices, manage your account settings, view transaction details, and set up your payment integration.
Upon your first login, the dashboard will not display any data. This is normal, as you have not yet received any cryptocurrency payments via Maxelpay. Once transactions are processed, your account will update to reflect the relevant activity and balance.
Existing Merchants: Log in with your previously registered email and password on the login page.
Choose The Environment: enable or disable the test mode.
From the MaxelPay dashboard, you can toggle the Test Mode ON or OFF.
When Test Mode is enabled, you can perform transactions as if they were real, allowing you to ensure that your integration works as intended. However, please note that during this mode, you will not receive actual payments but you can receive test currency.
To start receiving real payments, you must disable Test Mode. Ensure that you have thoroughly tested your integration before switching to live mode.
Click on Continue to "Create Your Wallet" link as shown in the image below.
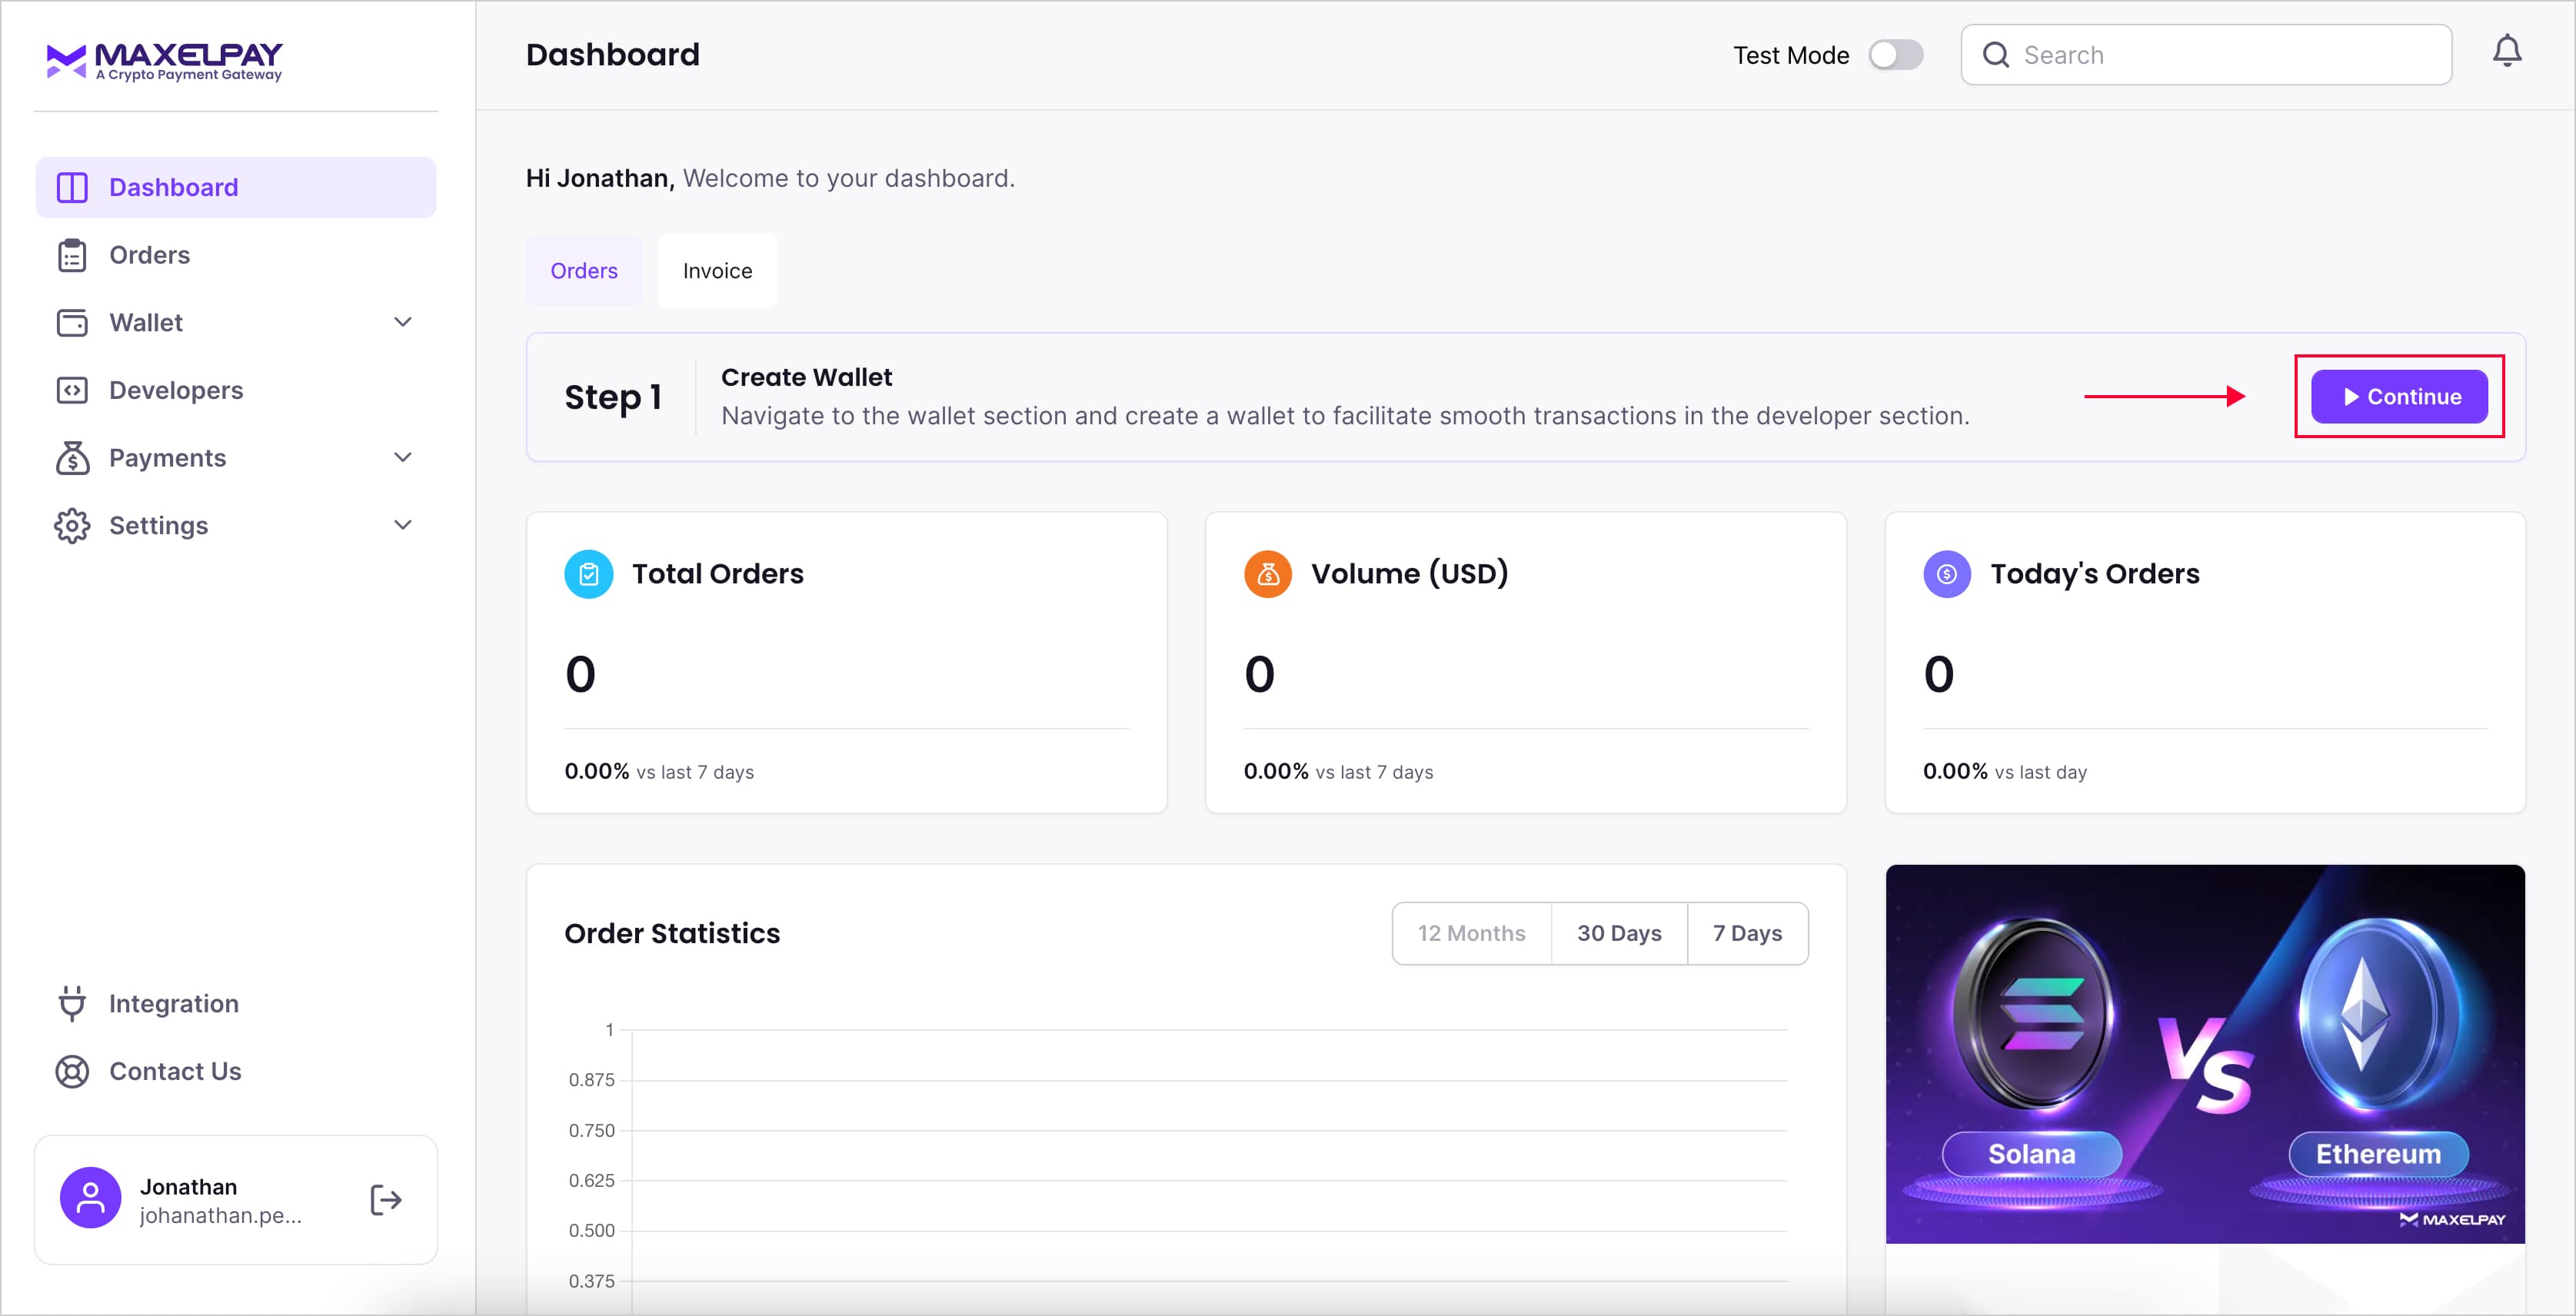
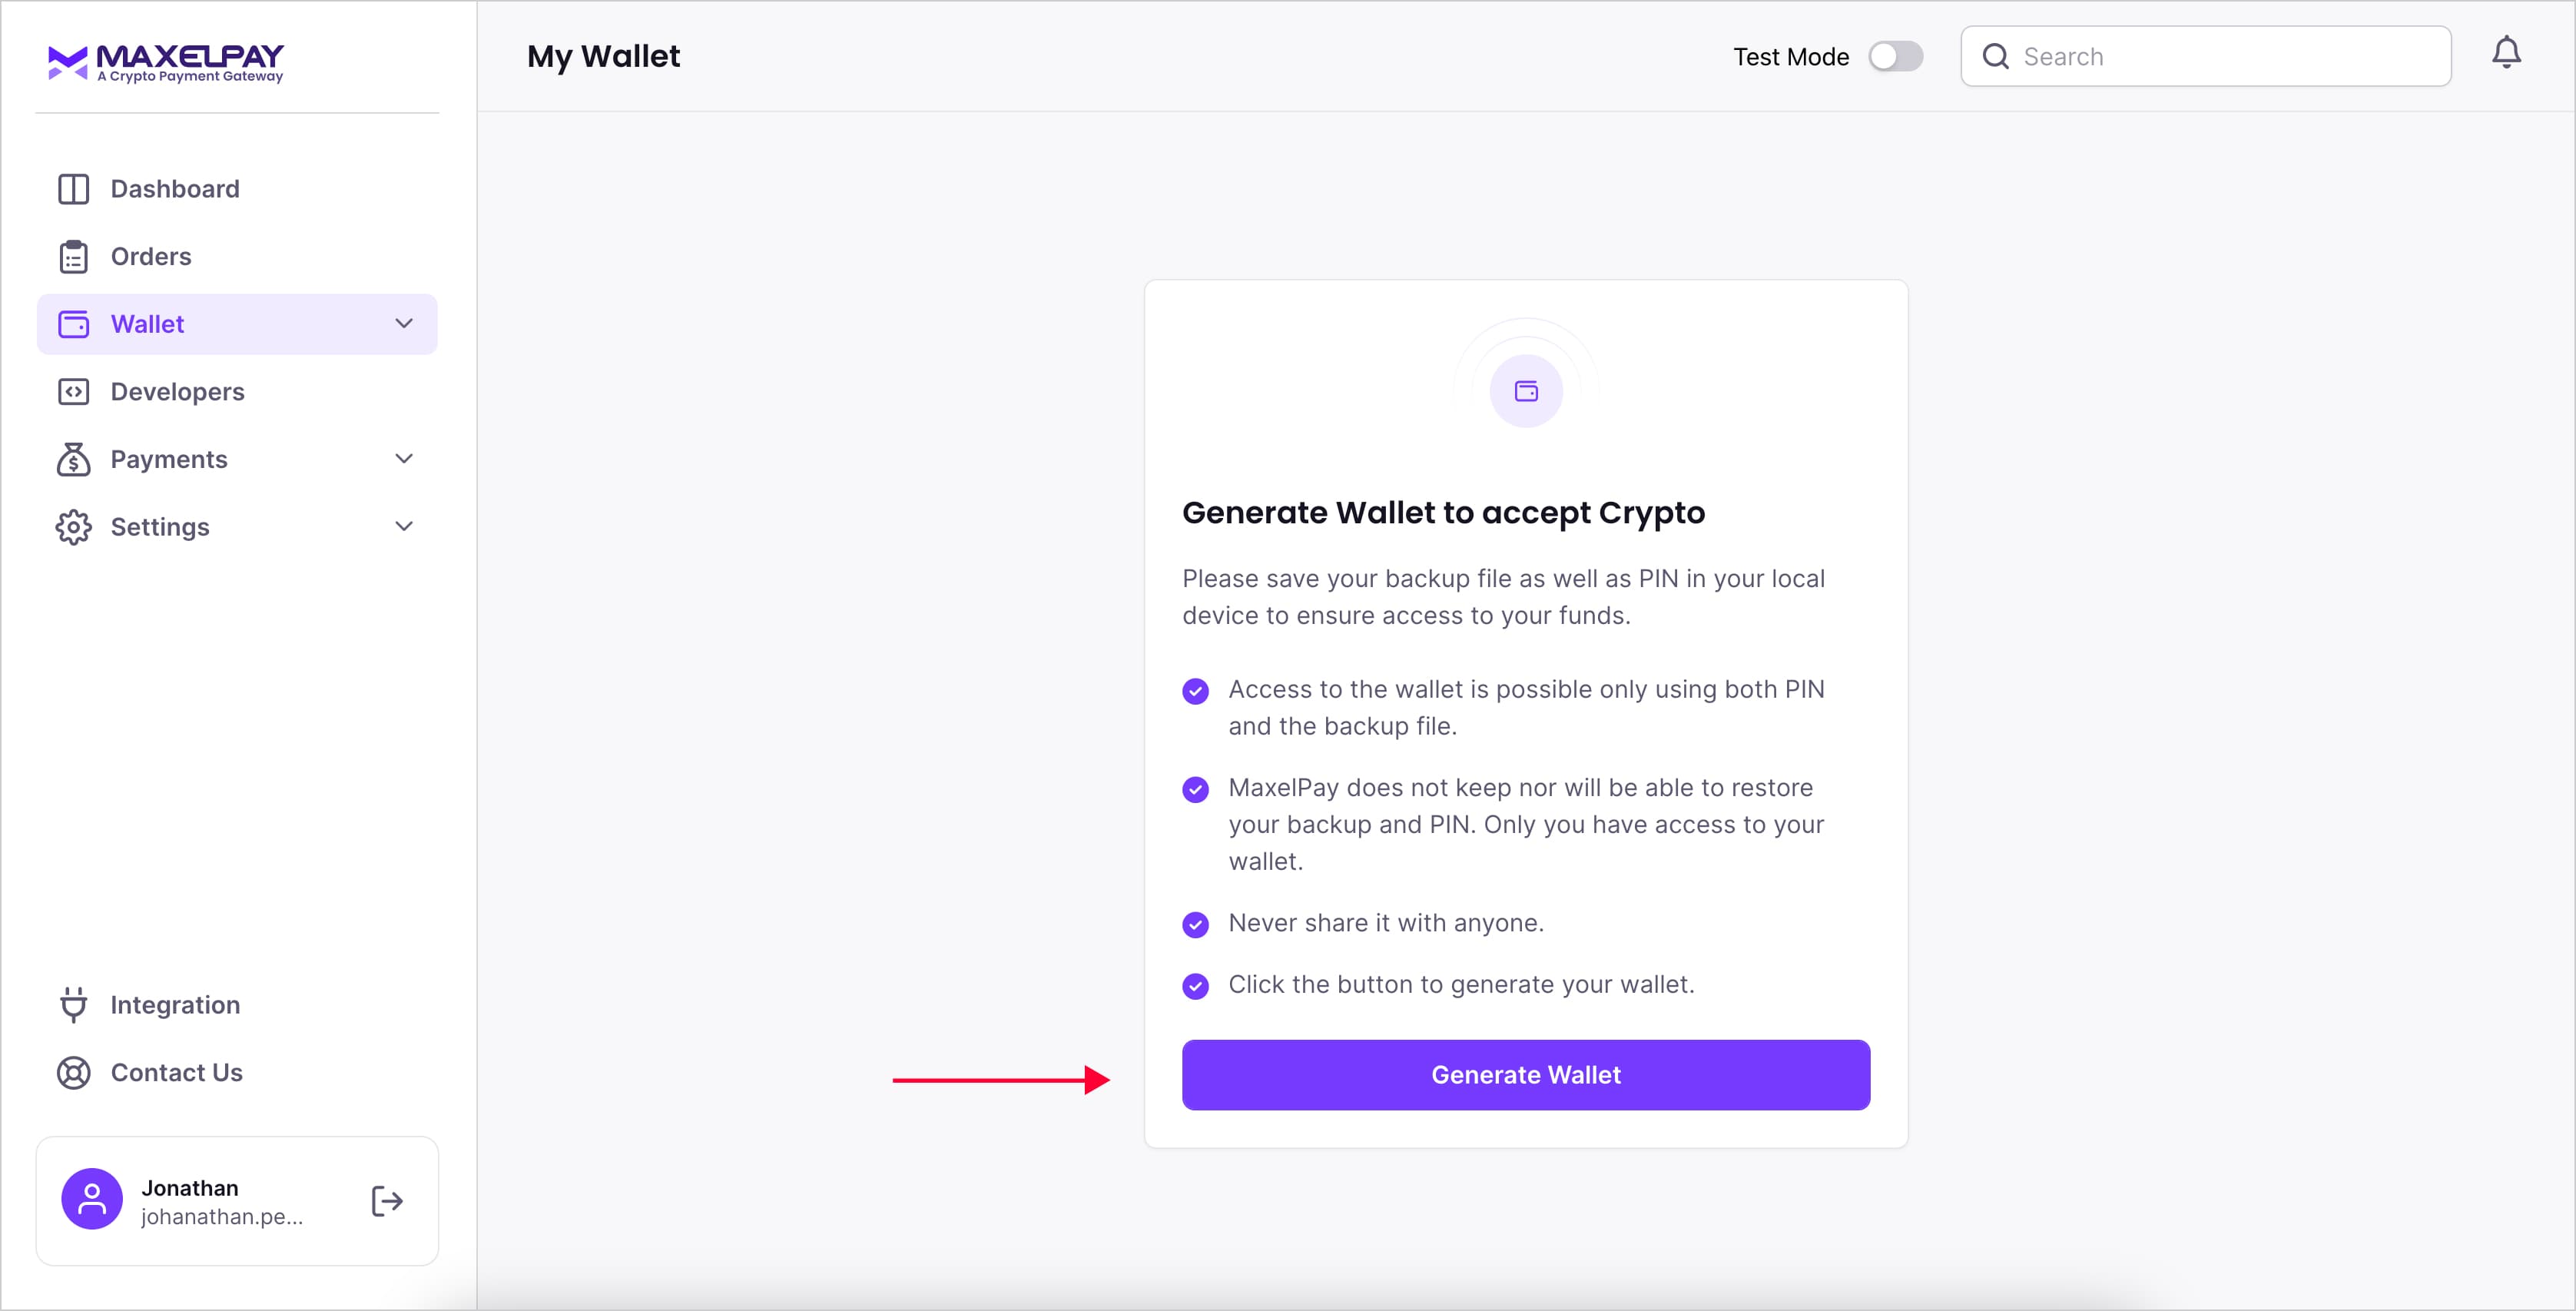
Click "Generate Wallet" as indicated.
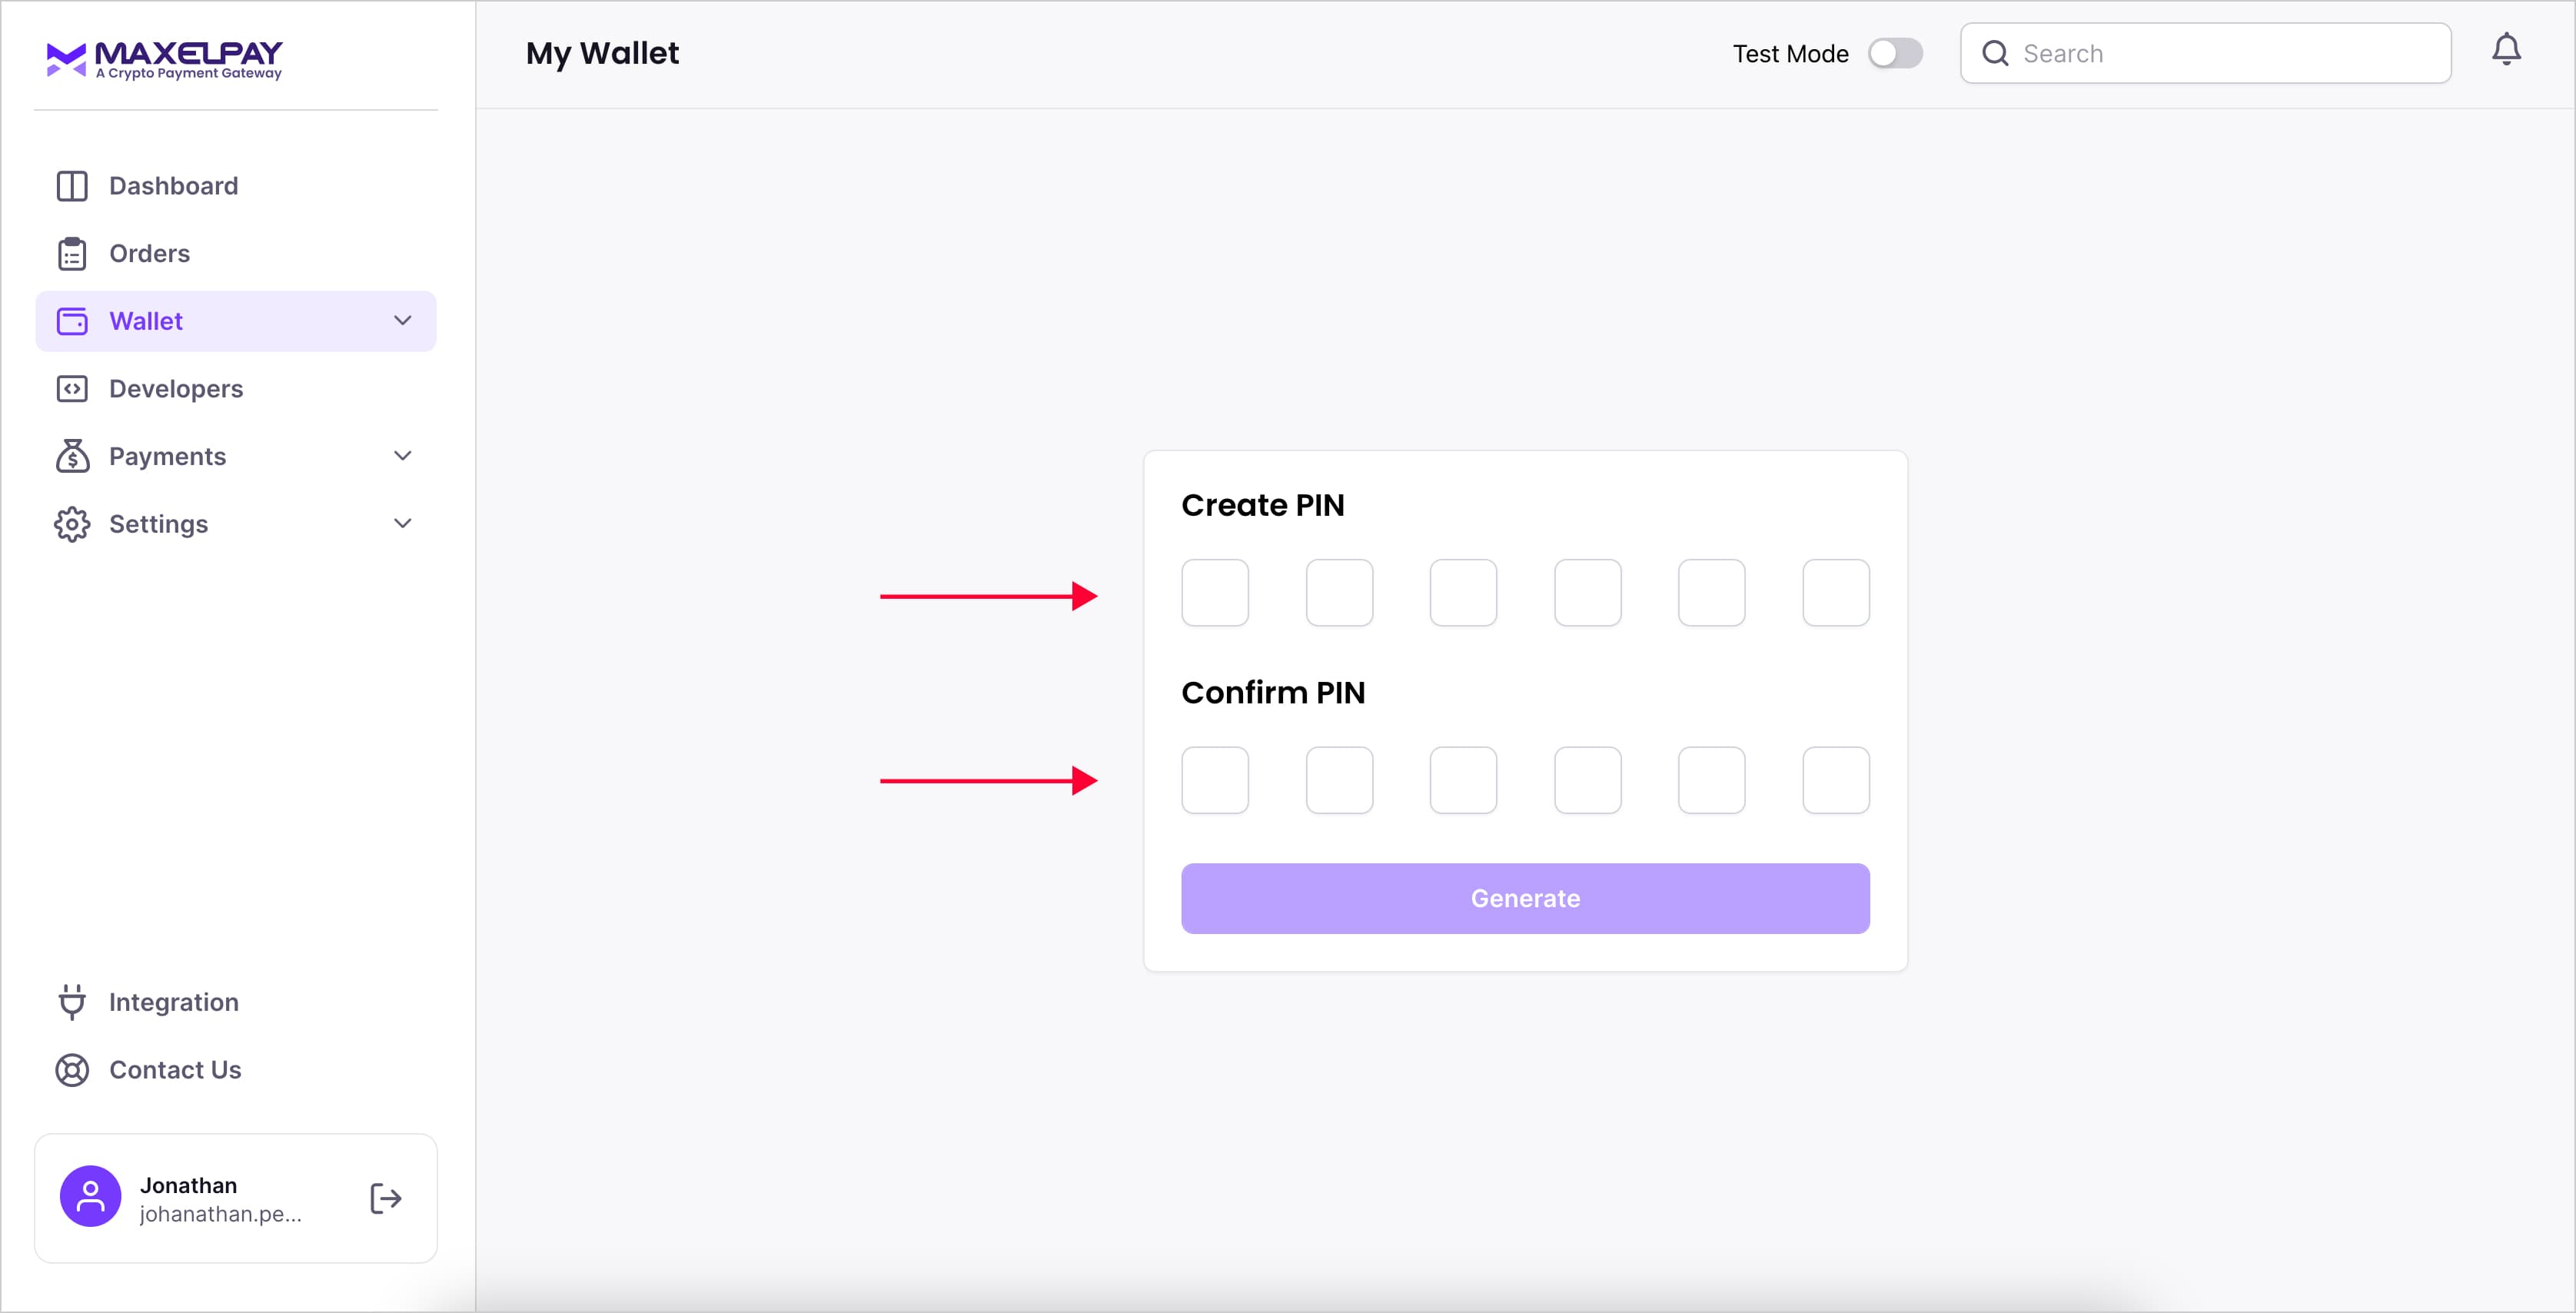
Set up a “Secure PIN” for your wallet.
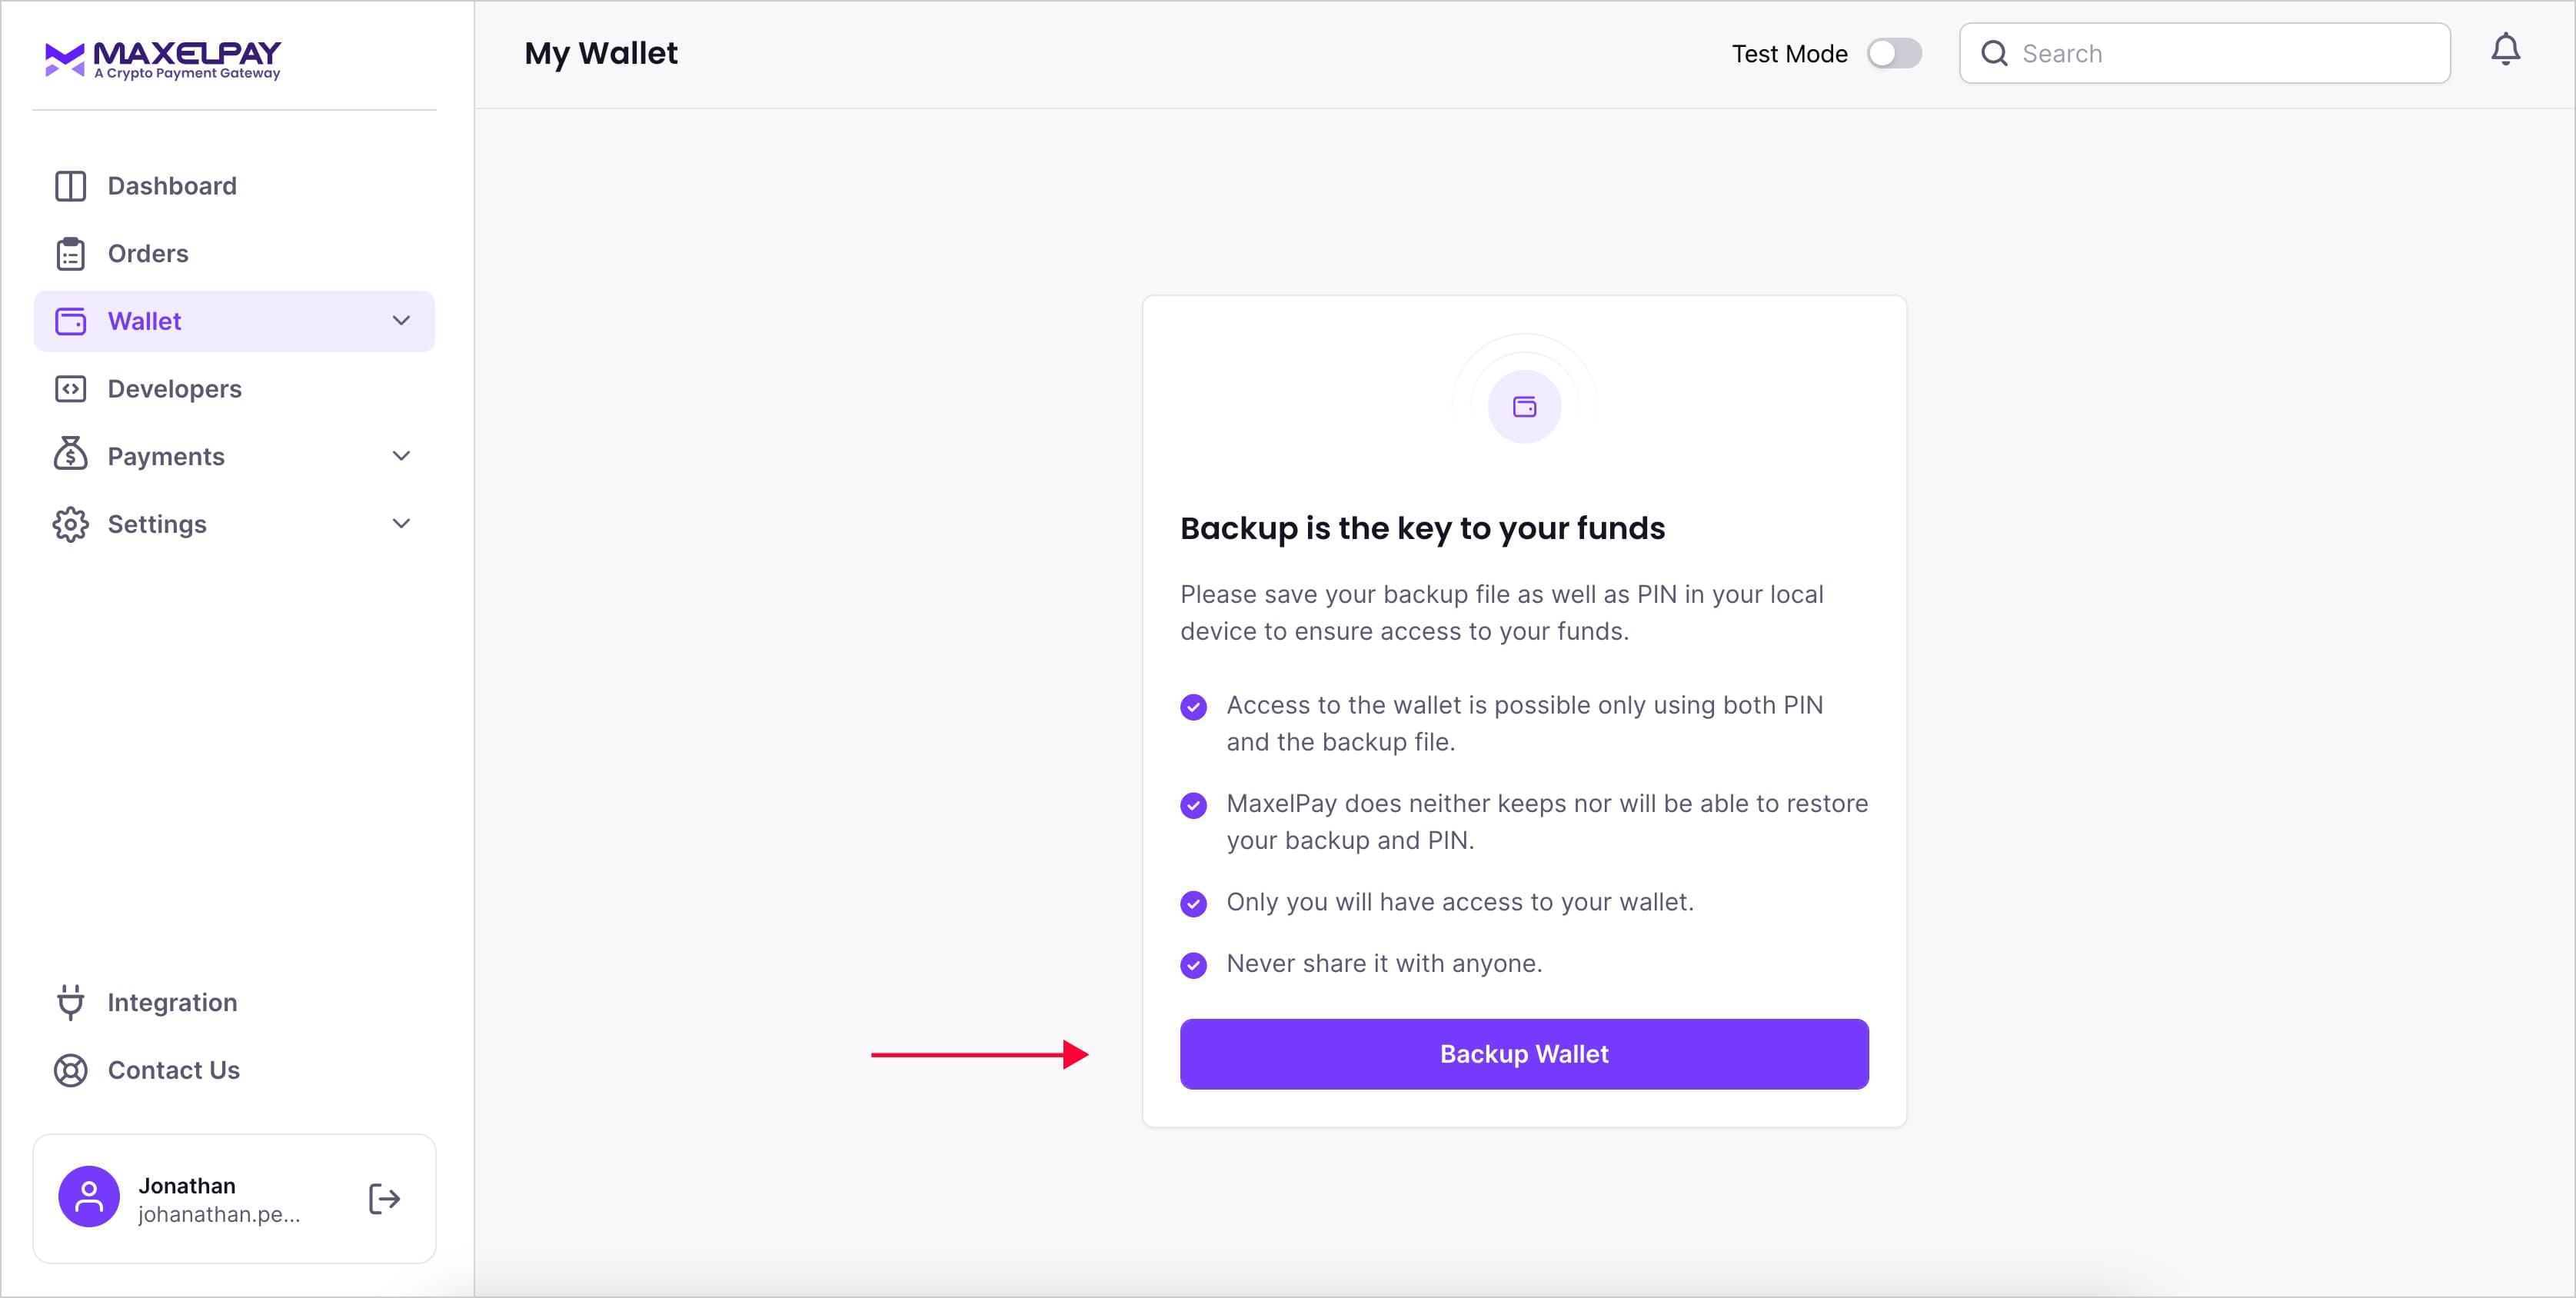
Your wallet will be created successfully. Take a backup of your wallet; a “.txt file” will be downloaded and saved in your device. An email will be sent with the files containing the Set PIN and encoded private key.
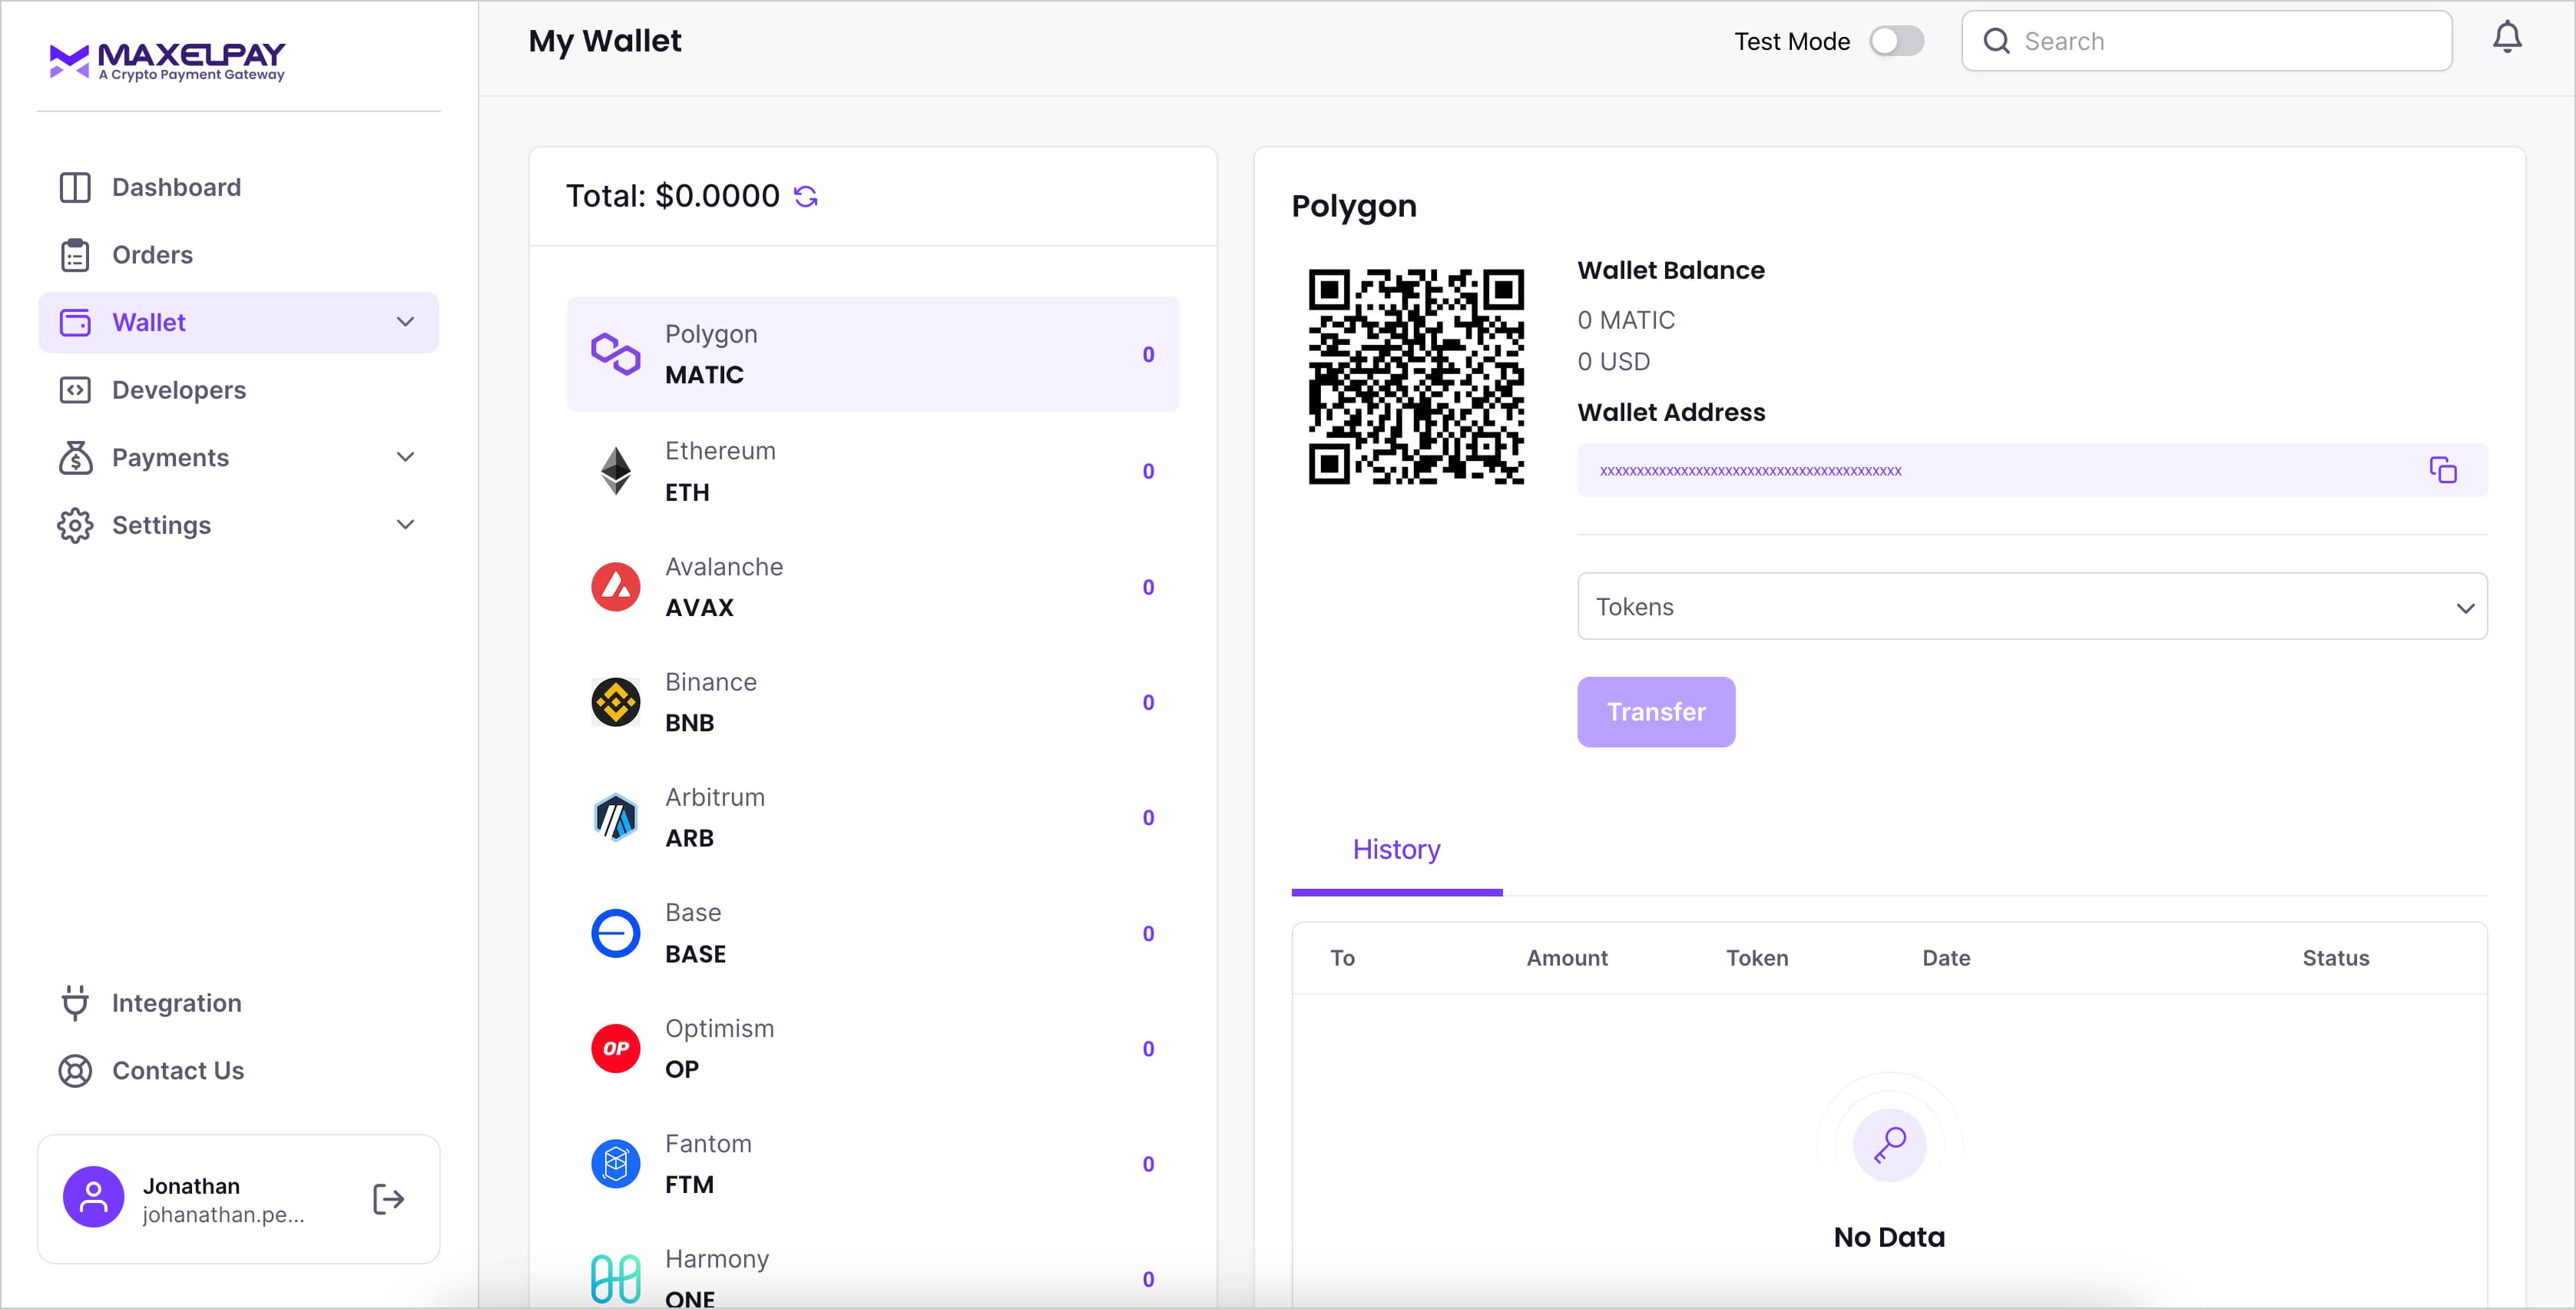
Your wallet is now ready to use, enabling you to easily manage your transactions, store your digital assets securely, and make instant payments.
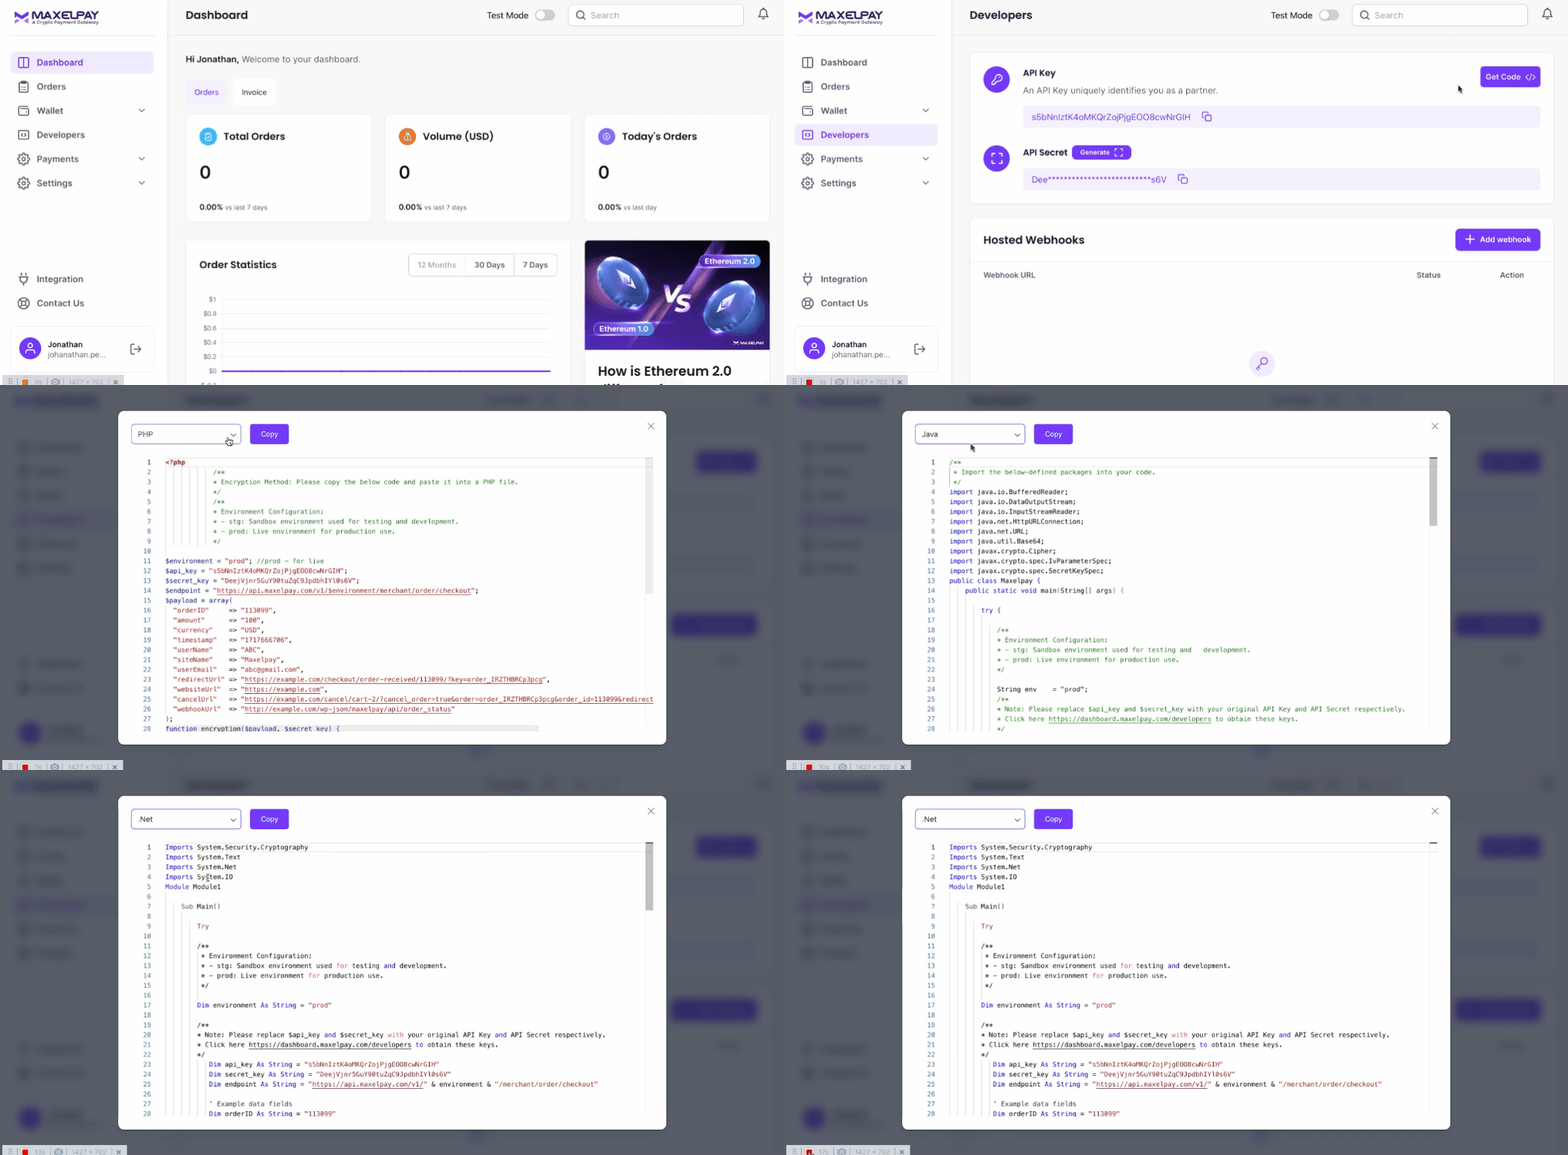
Go to the “Developers” section from the left sidebar of your dashboard. Here you will find your API Key and API Secret Key. These credentials are essential for authenticating your requests to the MaxelPay API. Keep them secure and do not share them publicly. Hover on “Get Code”. Here you can choose PHP, Python, React/Node, .Net and Java and copy the encryption code of languages selected. MaxelPay provides a variety of package options for seamless integration with multiple platforms:

For Wordpress Websites: Install the MaxelPay Woocommerce plugin from the official WordPress repository: MaxelPay WooCommerce Plugin.
For Laravel Package: For Laravel applications, you can install the MaxelPay package via Composer: MaxelPay Laravel Package.
NPM Package (for Node.js): Use the MaxelPay JavaScript SDK in your Node.js application: MaxelPay NPM Package.

After completing the integration and establishing a connection between MaxelPay and your website, you will need to add a Webhook URL. This URL will direct users to a designated page after a successful transaction.
Environment | URL |
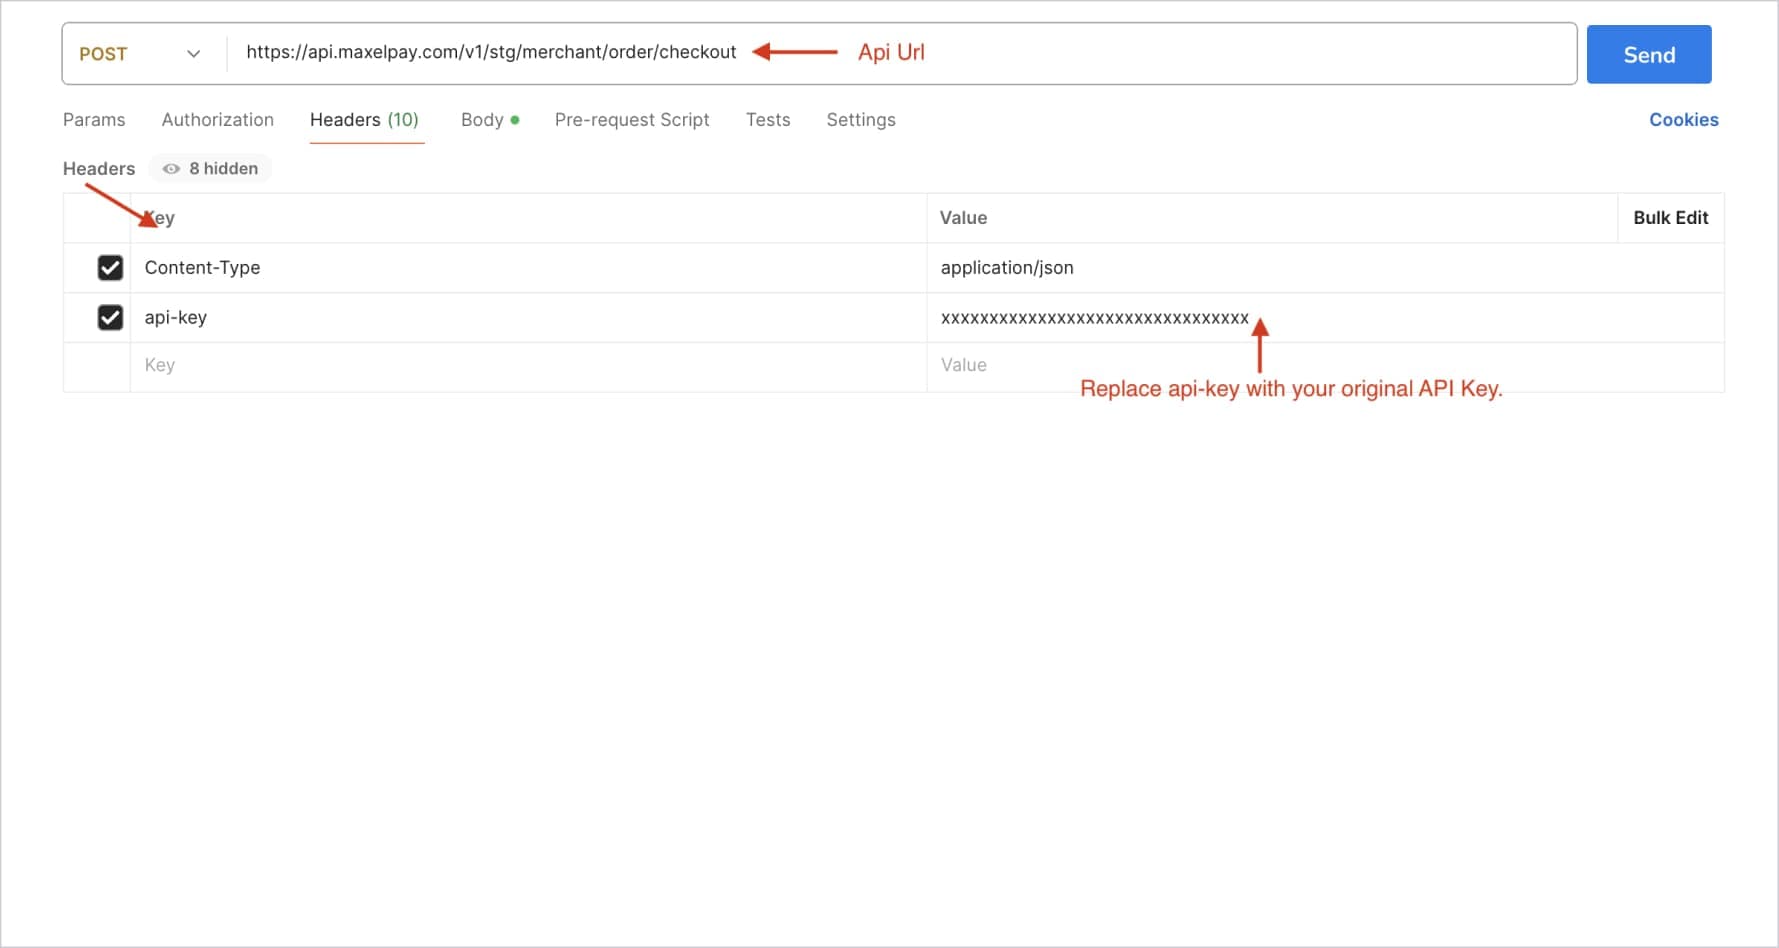
Sandbox | https://api.maxelpay.com/v1/stg/merchant/order/checkout |
Live | https://api.maxelpay.com/v1/prod/merchant/order/checkout |
Headers:
Key | Value |
Content-Type | application/json |
api-key | String |
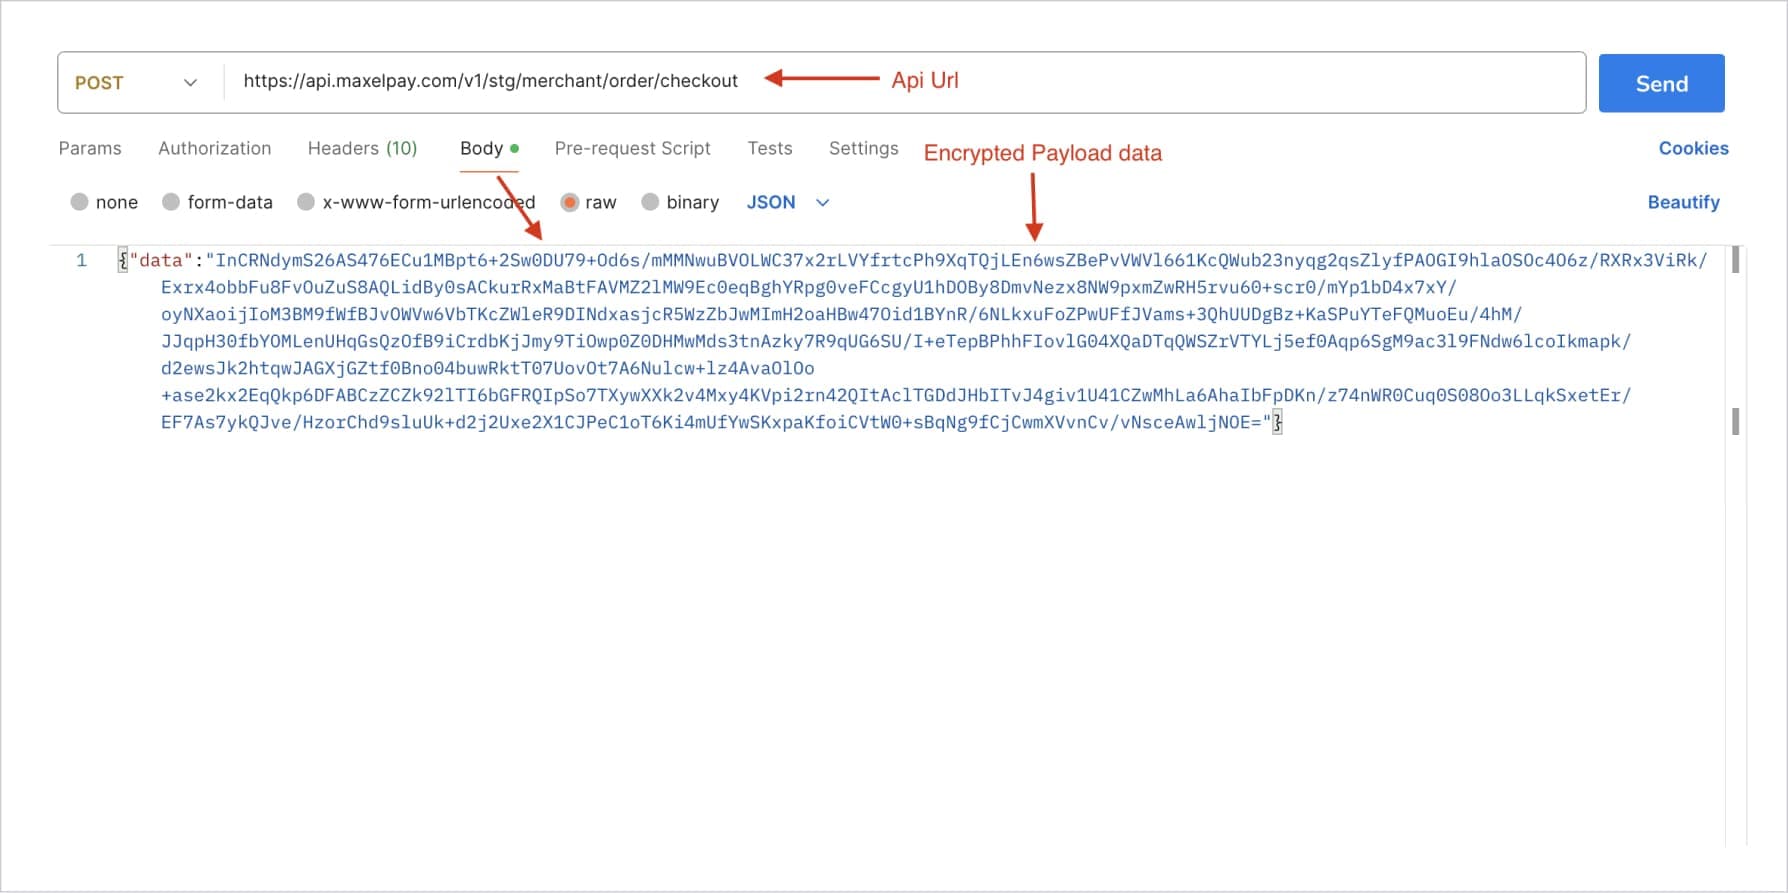
Payload: The payload must be sent securely. You may use encryption to protect it during the payload data transmission. The developer or user can choose or copy the encryption code of any listed language from the Request Example provided at the right side.
Encryption Mode: AES-256-CBC
Attributes | Type | Description |
orderID | string, number (*Required) | Unique identifier for the resource. Example: AB-1001, 101 etc. |
amount | number, double (*Required) | Total Amount. e.g 100 or 10.20. |
currency | The supported currency listed is defined below. (*Required) | Currency in ISO format. Options: INR, USD, etc. |
timestamp | Unix timestamp (*Required) | UNIX timestamp format. eg:- 1717666706. |
userName | string (*Required) | User Name, Who Places the Order. The max length is 60. |
siteName | string (*Required) | Your Site Title. e.g. Google, Maxelpay, etc. |
userEmail | string (*Required) | User Email, Who Places the Order. Eg: yourmail@domain.com |
redirectUrl | string (*Required) | Redirect users to the Merchant thankyou page after successful payment. |
websiteUrl | string (*Required) | Your Site URL where the gateway is integrated. |
cancelUrl | string (*Required) | Redirect Users to the Merchant cancel page when they cancel the Payment. |
webhookUrl | string (*Required) | Used for communication between maxelpay and merchant websites for order status updates. |
Name | Abbreviations |
United States Dollar | USD |
Japanese Yen | JPY |
Bulgarian Lev | BGN |
Czech Koruna | CZK |
Danish Krone | DKK |
British Pound Sterling | GBP |
Hungarian Forint | HUF |
Polish Zloty | PLN |
Romanian Leu | RON |
Swedish Krona | SEK |
Swiss Franc | CHF |
Icelandic Krona | ISK |
Norwegian Krone | NOK |
Croatian Kuna | HRK |
Russian Ruble | RUB |
Turkish Lira | TRY |
Australian Dollar | AUD |
Brazilian Real | BRL |
Canadian Dollar | CAD |
Chinese Yuan | CNY |
Hong Kong Dollar | HKD |
Indonesian Rupiah | IDR |
Israeli New Shekel | ILS |
Indian Rupee | INR |
South Korean Won | KRW |
Mexican Peso | MXN |
Mexican Peso | MYR |
New Zealand Dollar | NZD |
Philippine Peso | PHP |
Singapore Dollar | SGD |
Thai Baht | THB |
South African Rand | ZAR |
Euro | EUR |
Stepwise Guide to Encrypt the Payload data.
Prepare the Data: Get the plain text (Payload data) that you want to encrypt.
Choose Encryption Method: AES-256-CBC is an encryption method that uses a 256-bit key and works in Cipher Block Chaining (CBC) mode or You can use the CryptoJS library for this, which has built-in support.
Secret Key: Use the provided secret key for encryption.
Set Options (Scheme): When set to true, the function returns the raw binary data.
Generate Initialization Vector (IV): Take the first 16 characters (or bytes) from the secret key and use them as the IV.
Use your custom encryption method with these parameters: plain text data, encryption method, secret key, options, IV, and handle the encrypted output.
Request Examples
/**
 * Encryption example & Call:
 * An example of payload data:
*/
let payload = {
"orderID": "113099",
"amount": "100",
"currency": "USD",
"timestamp": "1717666706",
"userName": "ABC",
"siteName": "Maxelpay",
"userEmail": "abc@gmail.com",
"redirectUrl" :"https://example.com/checkout/order-received/113099/?key=order_IRZTHBRCp3pcg",
"websiteUrl": "https://example.com",
curl --location 'https://api.maxelpay.com/v1/{environment}/merchant/order/checkout' \
"webhookUrl": "http://example.com/wp-json/maxelpay/api/order_status"
}
const secret_key = "xxxxxxxxxxxxxxxxxxxxxxxxxxxxxxxx";
/**
* For module import
 import CryptoJS from 'crypto-js'
*/
/**
* For common js import
*/
const CryptoJS=require('crypto-js')
const encryption = ( secret_key, payload ) => {
const key = CryptoJS.enc.Utf8.parse(secret_key);
const ivHex = CryptoJS.enc.Utf8.parse(secret_key.substr(0, 16));
const encrypted = CryptoJS.AES.encrypt(payload, key, {
iv: ivHex, mode:CryptoJS.mode.CBC, padding:CryptoJS.pad.Pkcs7
});
return encrypted.toString();
};
payload = JSON.stringify( payload );
const encrypt_payload = encryption( secret_key, payload );
Purpose: The function encrypts payload data using a secret key and returns the encrypted result.
After encryption, the expected data will be:
InCRNdymS26AS476ECu1MBpt6+2Sw0DU79+Od6s/mMMNwuBVOLWC37x2rLVYfrtcPh9XqTQjLEn6wsZBePvVWVl661KcQWub23nyqg2qsZlyfPAOGI9hlaOSOc4O6z/RXRx3ViRk/Exrx4obbFu8FvOuZuS8AQLidBy0sACkurRxMaBtFAVMZ2lMW9Ec0eqBghYRpg0veFCcgyU1hDOBy8DmvNezx8NW9pxmZwRH5rvu60+scr0/mYp1bD4x7xY/oyNXaoijIoM3BM9fWfBJvOWVw6VbTKcZWleR9DINdxasjcR5WzZbJwMImH2oaHBw47Oid1BYnR/6NLkxuFoZPwUFfJVams+3QhUUDgBz+KaSPuYTeFQMuoEu/4hM/JJqpH30fbYOMLenUHqGsQzOfB9iCrdbKjJmy9TiOwp0Z0DHMwMds3tnAzky7R9qUG6SU/I+eTepBPhhFIovlG04XQaDTqQWSZrVTYLj5ef0Aqp6SgM9ac3l9FNdw6lcoIkmapk/d2ewsJk2htqwJAGXjGZtf0Bno04buwRktT07UovOt7A6Nulcw+lz4AvaOlOo+ase2kx2EqQkp6DFABCzZCZk92lTI6bGFRQIpSo7TXywXXk2v4Mxy4KVpi2rn42QItAclTGDdJHbITvJ4giv1U41CZwMhLa6AhaIbFpDKn/z74nWR0Cuq0S08Oo3LLqkSxetEr/EF7As7ykQJve/HzorChd9sluUk+d2j2Uxe2X1CJPeC1oT6Ki4mUfYwSKxpaKfoiCVtW0+sBqNg9fCjCwmXVvnCv/vNsceAwljNOE=
Choose Environment Options:
stg for Sandbox.
prod for Live.
Replace {environment} with stg or prod.
curl --location 'https://api.maxelpay.com/v1/{environment}/merchant/order/checkout' \
--header 'Content-Type: application/json' \
--header 'api-key: xxxxxxxxxxxxxxxxxxxxxxxxxxxxxxxx' \
--data
'{"data":"InCRNdymS26AS476ECu1MBpt6+2Sw0DU79+Od6s/mMMNwuBVOLWC37x2rLVYfrtcPh9XqTQjLEn6wsZBePvVWVl661KcQWub23nyqg2qsZlyfPAOGI9hlaOSOc4O6z/RXRx3ViRk/Exrx4obbFu8FvOuZuS8AQLidBy0sACkurRxMaBtFAVMZ2lMW9Ec0eqBghYRpg0veFCcgyU1hDOBy8DmvNezx8NW9pxmZwRH5rvu60+scr0/mYp1bD4x7xY/oyNXaoijIoM3BM9fWfBJvOWVw6VbTKcZWleR9DINdxasjcR5WzZbJwMImH2oaHBw47Oid1BYnR/6NLkxuFoZPwUFfJVams+3QhUUDgBz+KaSPuYTeFQMuoEu/4hM/JJqpH30fbYOMLenUHqGsQzOfB9iCrdbKjJmy9TiOwp0Z0DHMwMds3tnAzky7R9qUG6SU/I+eTepBPhhFIovlG04XQaDTqQWSZrVTYLj5ef0Aqp6SgM9ac3l9FNdw6lcoIkmapk/d2ewsJk2htqwJAGXjGZtf0Bno04buwRktT07UovOt7A6Nulcw+lz4AvaOlOo+ase2kx2EqQkp6DFABCzZCZk92lTI6bGFRQIpSo7TXywXXk2v4Mxy4KVpi2rn42QItAclTGDdJHbITvJ4giv1U41CZwMhLa6AhaIbFpDKn/z74nWR0Cuq0S08Oo3LLqkSxetEr/EF7As7ykQJve/HzorChd9sluUk+d2j2Uxe2X1CJPeC1oT6Ki4mUfYwSKxpaKfoiCVtW0+sBqNg9fCjCwmXVvnCv/vNsceAwljNOE="}'
'{"data":"InCRNdymS26AS476ECu1MBpt6+2Sw0DU79+Od6s/mMMNwuBVOLWC37x2rLVYfrtcPh9XqTQjLEn6wsZBePvVWVl661KcQWub23nyqg2qsZlyfPAOGI9hlaOSOc4O6z/RXRx3ViRk/Exrx4obbFu8FvOuZuS8AQLidBy0sACkurRxMaBtFAVMZ2lMW9Ec0eqBghYRpg0veFCcgyU1hDOBy8DmvNezx8NW9pxmZwRH5rvu60+scr0/mYp1bD4x7xY/oyNXaoijIoM3BM9fWfBJvOWVw6VbTKcZWleR9DINdxasjcR5WzZbJwMImH2oaHBw47Oid1BYnR/6NLkxuFoZPwUFfJVams+3QhUUDgBz+KaSPuYTeFQMuoEu/4hM/JJqpH30fbYOMLenUHqGsQzOfB9iCrdbKjJmy9TiOwp0Z0DHMwMds3tnAzky7R9qUG6SU/I+eTepBPhhFIovlG04XQaDTqQWSZrVTYLj5ef0Aqp6SgM9ac3l9FNdw6lcoIkmapk/d2ewsJk2htqwJAGXjGZtf0Bno04buwRktT07UovOt7A6Nulcw+lz4AvaOlOo+ase2kx2EqQkp6DFABCzZCZk92lTI6bGFRQIpSo7TXywXXk2v4Mxy4KVpi2rn42QItAclTGDdJHbITvJ4giv1U41CZwMhLa6AhaIbFpDKn/z74nWR0Cuq0S08Oo3LLqkSxetEr/EF7As7ykQJve/HzorChd9sluUk+d2j2Uxe2X1CJPeC1oT6Ki4mUfYwSKxpaKfoiCVtW0+sBqNg9fCjCwmXVvnCv/vNsceAwljNOE="}'
Adjust stg to prod depending on the environment you are targeting (sandbox or live).
Webhook URL: This is the endpoint on your server (or the merchant's server) where Maxelpay will send POST requests containing data related to order status updates or other events.
Example: https://your-api-endpoint.com/api/webhooks
https://your-api-endpoint.com would be replaced with the actual URL where your (merchant) server is hosted.
/api/webhooks is the endpoint route where Maxelpay will send POST requests and it's created by the merchant.
Purpose: This webhook is used for handling order status updates or payment notifications.
HTTP Method: Specify that the method should be POST for webhook URLs.
Data: The JSON payload (--data) includes essential information (order_id, maxelpay_txn, payment_status) related to a specific order and its payment status.
Headers: The api-key header suggests that the endpoint might be secured with an API key for authentication.
The Content-Type header indicates that the payload is in JSON format.
Request Examples
curl --location 'http://your-api-endpoint.com/api/webhooks' \
--header 'api-key: xxxxxxxxxxxxxxxx' \
--header 'Content-Type: application/json' \
--data '{ "order_id" : "123", "maxelpay_txn" : "123", "payment_status" : "completed" }'
Note: The merchant must create a webhook URL or REST API exactly as shown in the example above, including the same headers (api-key and Content-Type) and data structure (order_id, maxelpay_txn, payment_status).
--location: This describes curl to follow any HTTP redirects that the server sends as responses. Using this, merchants can receive immediate updates about payment notifications in real-time.
'http://your-api-endpoint/api/webhooks': This is the URL to which the POST request is sent. This webhook is intended to handle requests related to order status updates.
--header 'api-key: xxxxxxxxxxxxxxxxx': Sets an HTTP header with key api-key and value xxxxxxxxxxxxxxxxx'. This is likely used for authentication or authorization purposes. The actual value (xxxxxxxxxxxxxxxxx') would typically be replaced with an API key.
--header 'Content-Type: application/json': Specifies that the content being sent in the request body (--data) is in JSON format.
--data '{ "order_id":"123", "maxelpay_txn":"123", "payment_status":"completed" }': This is the JSON payload data that is sent as the body of the POST request. It contains information related to the order status update:
"order_id": "123": Identifier of the order and its value sent by MaxelPay.
"maxelpay_txn": "MX-123": Transaction identifier related to the payment and its value sent by MaxelPay.
"payment_status": "completed": Status of the payment sent by MaxelPay.
Go to the Developers section and click on "Add Webhook."
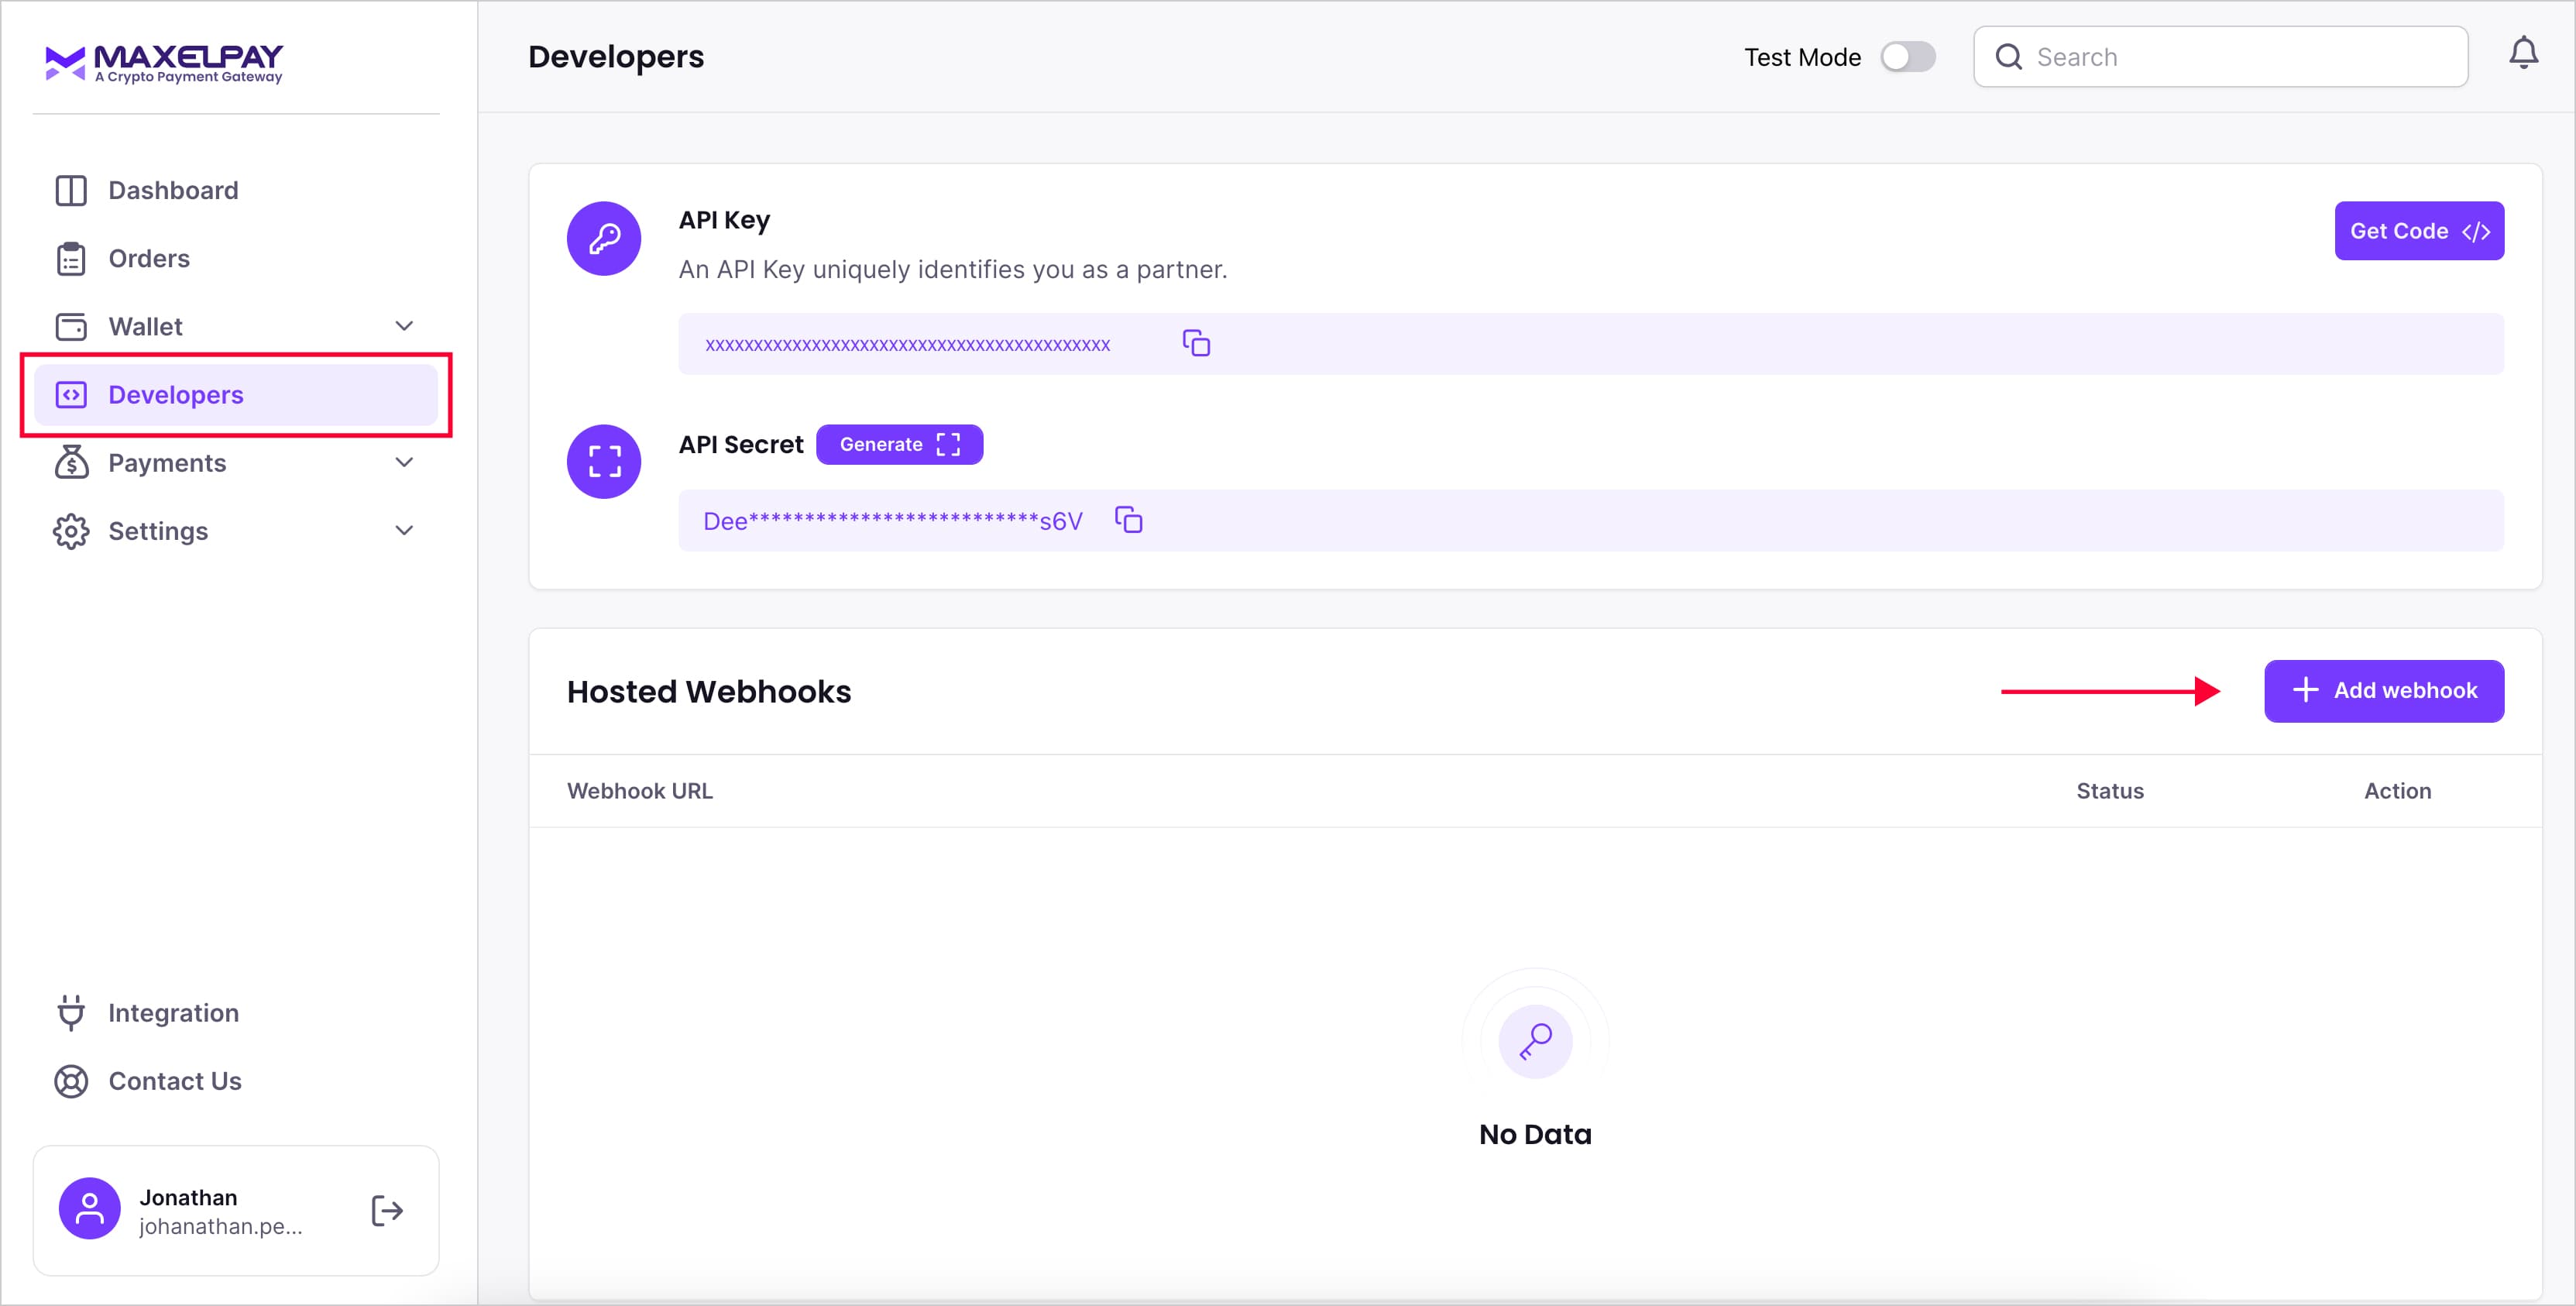
Enter your webhook URL and click "Save."
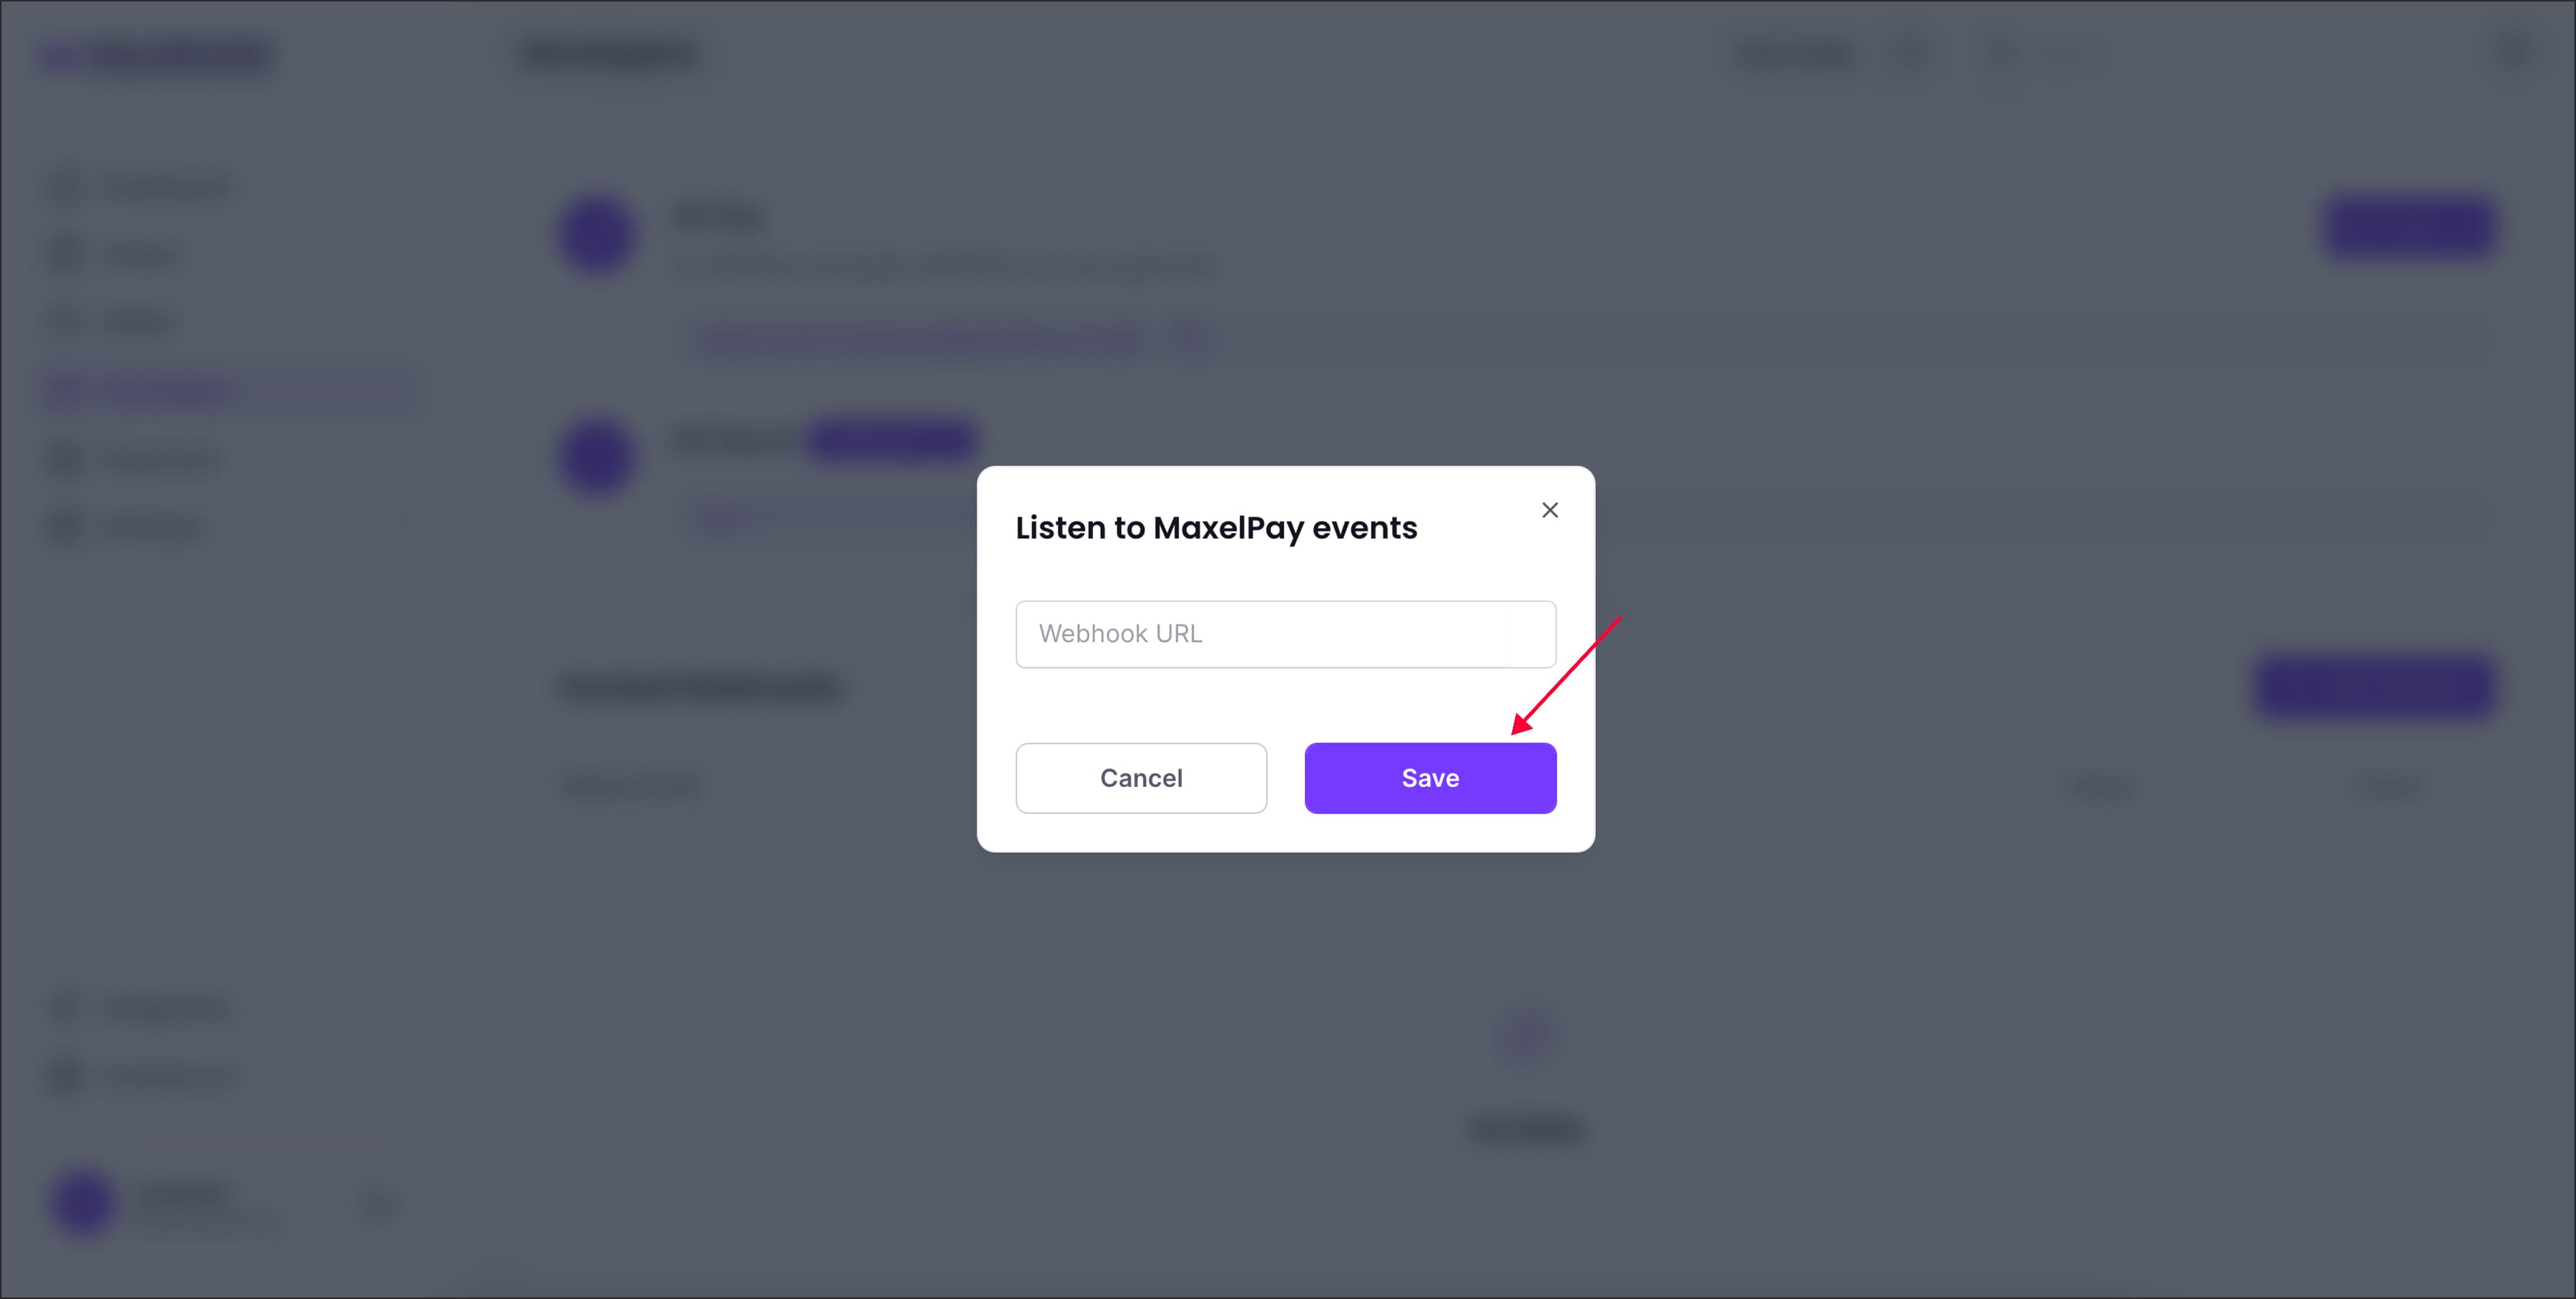
After you successfully add it, your webhook URL will appear under Hosted Webhooks.
And just like that, you've successfully finished the integration and webhook setup process, and you're ready to start receiving payments. Enjoy accepting cryptocurrencies with ease!
If you need assistance integrating APIs into your website, receive 24/7 Free developer support.
